

Custom API
Connect your agent to any external service using custom API integration.
Custom API integration connects your agent to external services through REST APIs, allowing it to fetch data or perform actions using third-party services.
Key benefits
- Access external data sources in real-time
- Connect to your own backend services
- Integrate with virtually any REST API endpoint
- Extend your agent's capabilities with custom functionality
Setup option 1: from the main dashboard
Open the integrations page
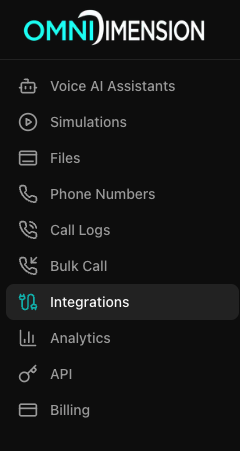
Go to the Integrations page in your dashboard and select the All Integrations tab.
Connect a Custom API
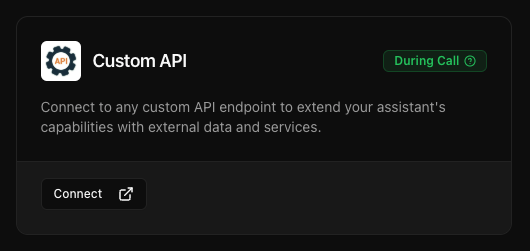
Find the Custom API card and click Connect. Configure your API (see configuration details below) and test it in the Test tab.
Attach to your agent
Go to your agent's edit page, open the Integrations tab, and attach the integration from the dropdown.
Setup option 2: from agent configuration
Open the agent's integrations tab
Go to your agent's edit page and select the Integrations tab.
Connect a Custom API
Under Connect New Integrations, find Custom API and click Connect. Configure and test your API. The integration will automatically attach to your agent.
Setup option 3: from the chat interface
Ask in chat
Use natural language like "Connect my CRM api" or "Connect my Airtable api". A connection widget will automatically appear.
Add the integration
Click Add integration to navigate to the integration tab. Under Connect New Integrations, find Custom API Integration and click Connect. Configure your integration.
Setup option 4: with the API
Create the integration once, then attach it to any agent. Your API key goes in
the Authorization: Bearer header. Resellers can do this for a client's agent
by adding user_id. See Acting as clients.
Create the integration
API reference: Create a custom API integration
curl -X POST "https://omnidim.io/api/v1/integrations/custom-api" \
  -H "Authorization: Bearer YOUR_API_KEY" \
  -H "Content-Type: application/json" \
  -d '{
    "name": "Order status",
    "description": "Look up an order'\''s delivery status by order number.",
    "url": "https://api.acme-corp.io/orders/status",
    "method": "POST",
    "headers": [{ "key": "Authorization", "value": "Bearer YOUR_TOKEN" }],
    "body_params": [
      {
        "key": "order_number",
        "description": "The order number the caller reads out",
        "type": "string",
        "required": true,
        "isLLMGenerated": true
      }
    ]
  }'
You get back its integration_id. Saved keys and tokens come back hidden as
********, here and every time you read the integration.
{
  "success": true,
  "integration_id": 4821,
  "integration": {
    "name": "Order status",
    "url": "https://api.acme-corp.io/orders/status",
    "method": "POST",
    "headers": [{ "key": "Authorization", "value": "********" }]
  }
}
If the name is already used in your account, you get a 400 and nothing is
saved.
Attach it to an agent
API reference: Attach an integration to an agent
curl -X POST "https://omnidim.io/api/v1/agents/158910/integrations" \
  -H "Authorization: Bearer YOUR_API_KEY" \
  -H "Content-Type: application/json" \
  -d '{ "integration_id": 4821 }'
From the next call, the agent can use it. An agent or integration that doesn't
exist, or isn't yours, returns 404.
Check or remove it
- See what an agent has attached: List an agent's integrations
- Take one off an agent: Detach an integration
- See every integration in your account: List integrations
Configuration guide: basic settings
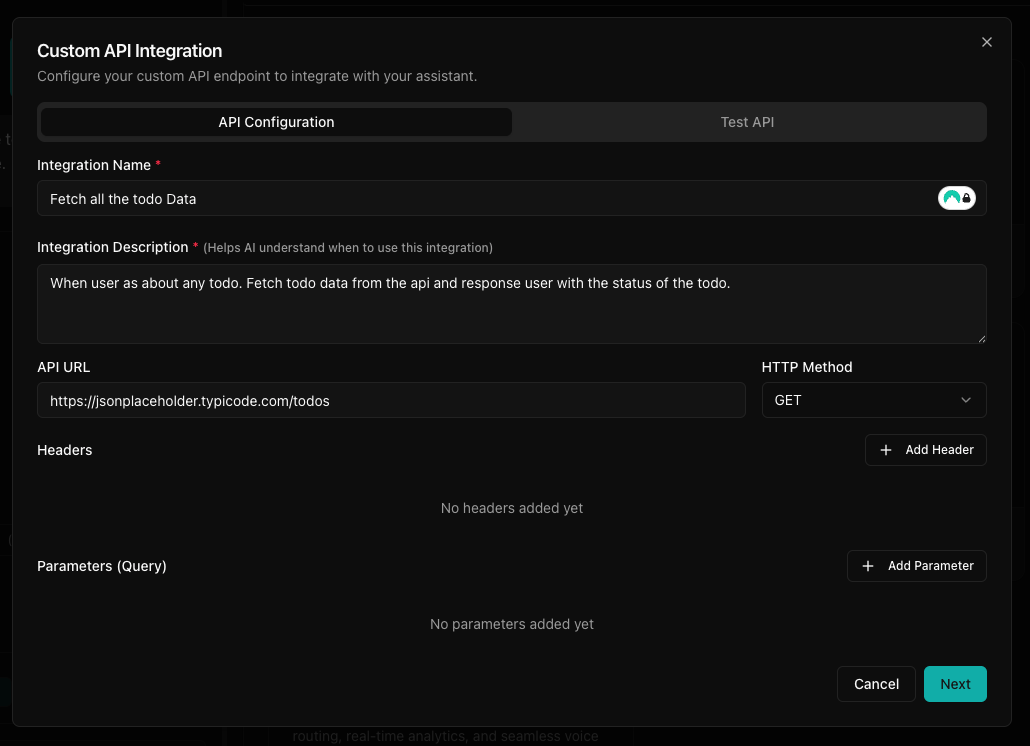
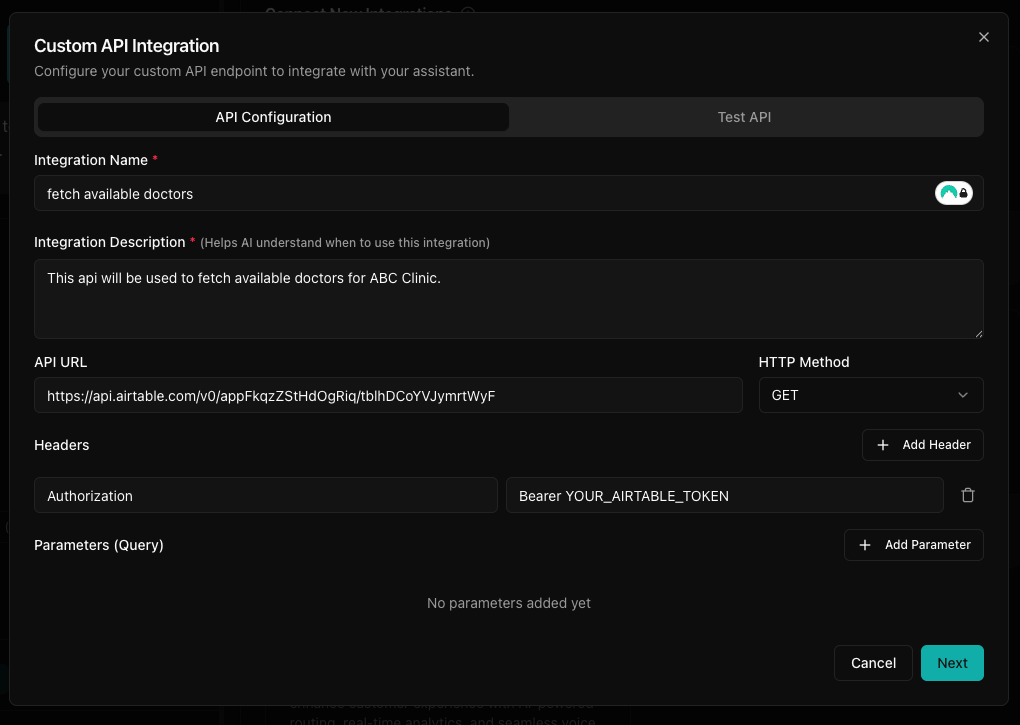
- Integration Name: choose a descriptive name (for example, "Weather API")
- Description: explain the API's purpose and usage. This is important for LLM tool calling.
- URL: full endpoint URL (for example,
https://api.example.com/data) - Method: select HTTP method (GET, POST, PUT, DELETE)
Configuration guide: headers
- Authorization tokens
Content-Typespecifications- API keys
- Custom headers
Configuration guide: parameters
Specify both query parameters (GET) and body parameters (POST or PUT).
- Name: parameter identifier
- Description: purpose of this parameter
- Required: toggle between optional and required
- Data Type: select from dropdown
- AI Generated: toggle whether the AI should dynamically generate values
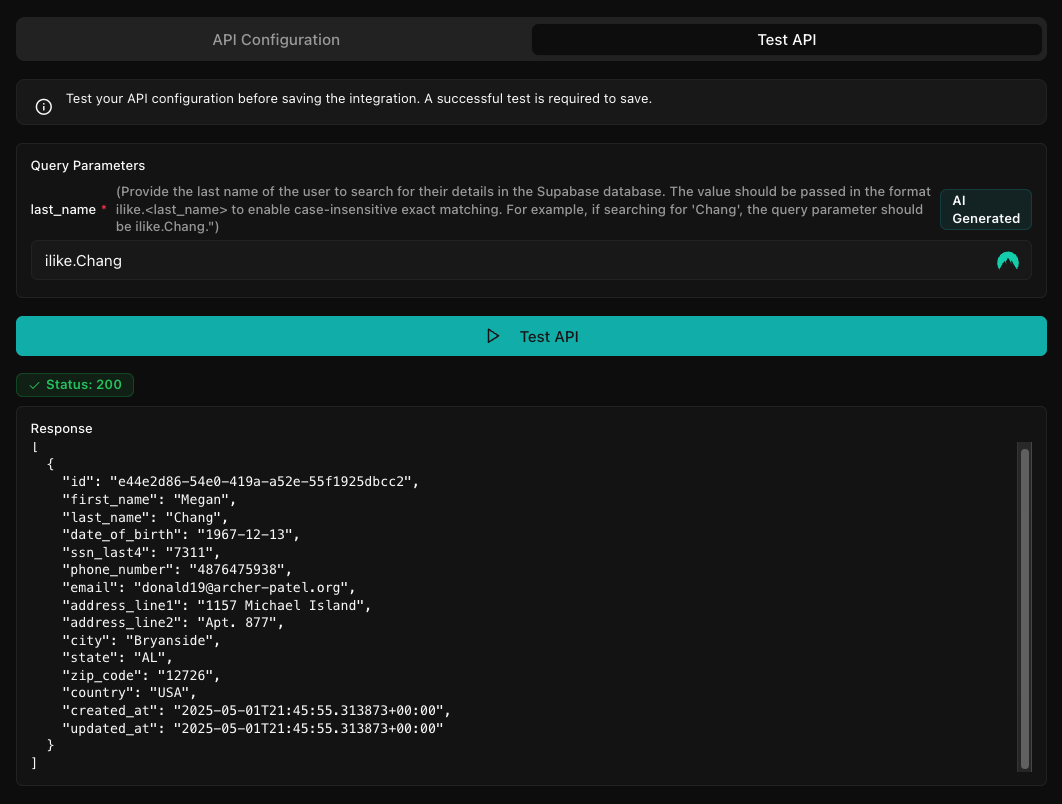
Testing your integration
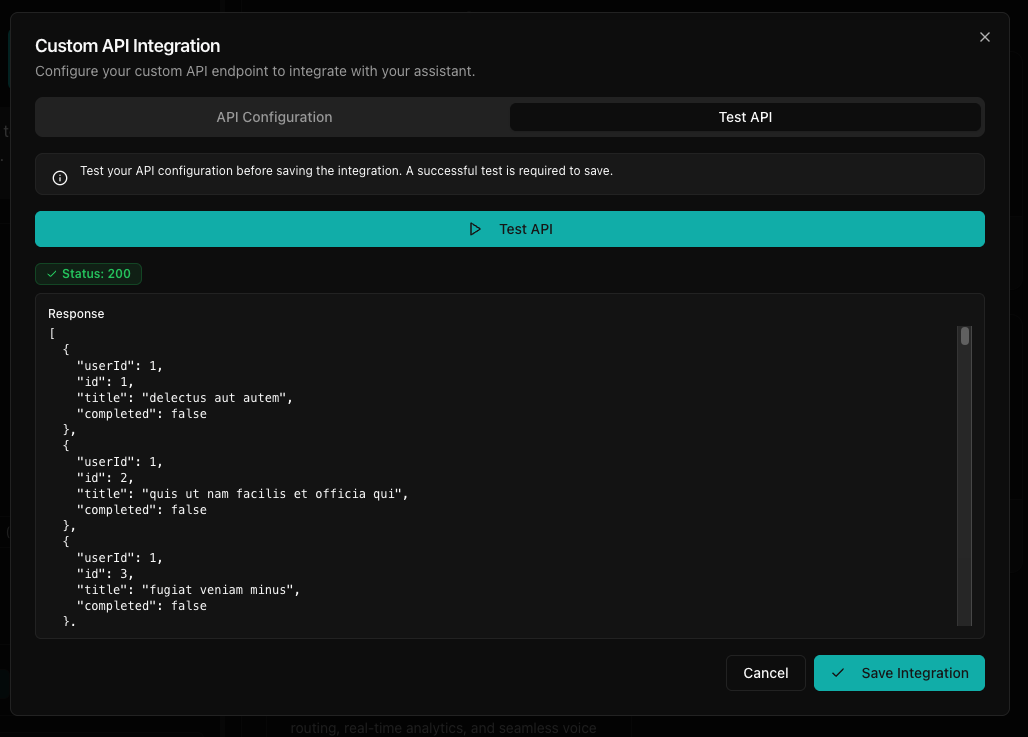
Open the test tab
Navigate to the Test tab.
Save the integration
After successful testing, click Save Integration.
Using with your agent
- Once connected, your agent will automatically use this API when appropriate
- Usage is determined based on the API description you provide
Passing the current call's phone numbers
With Pass call metadata on, every request your agent makes with POST,
PUT, PATCH or DELETE gets these fields in its JSON body, when the call
has them:
| Field | Value |
|---|---|
from_number | The number of the person your agent is talking to |
to_number | The current call's destination number |
call_sid | The call's ID, to match the request to the call later |
The switch is in the integration's Config tab. It is on by default for new integrations, including ones made with the API. Check it on older integrations before you rely on it. The Test tab sends sample values. A live call sends the real ones.
A GET request has no body, so these fields aren't sent. Use POST if your
endpoint needs them. Turn the switch off if your endpoint rejects fields it
doesn't expect.
The AI Generated setting is separate: it lets the agent fill a parameter
from the conversation. Naming a parameter phone_number does not fill it with
the call's number.
Example: Airtable
Example of using Airtable with custom API integration.
Example: Supabase user authentication
Walk through creating a complete Supabase authentication integration step by step.
Add integration name and description
Make sure descriptions are clear and concise. The AI uses them to understand the integration and decide when to call it.
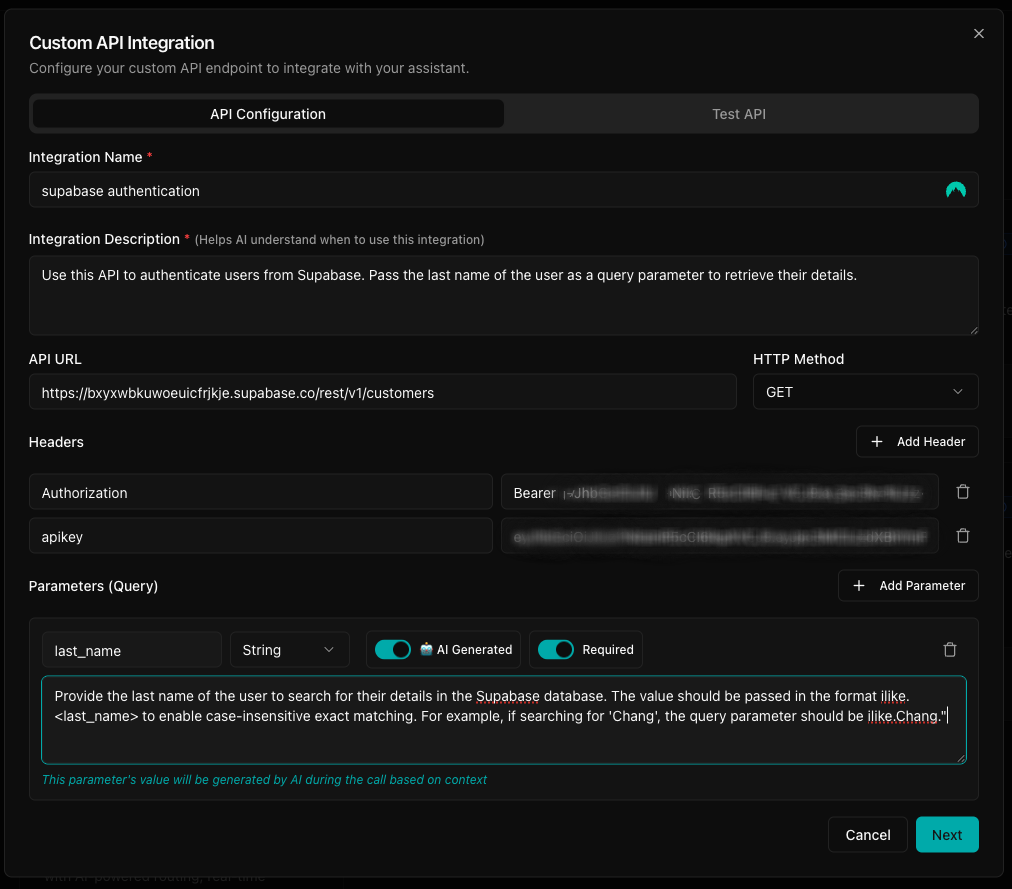
Configure URL, method, and parameters
Set the API URL and HTTP method, then add the query parameters needed for the request. Enable AI Generated on the query parameters so the agent can derive the values from the conversation.
Test and save
Click next to move to the test step, run a sample request, and save the integration once the response is correct.
Other example use cases
- CRM integration: retrieve customer data from Salesforce or HubSpot
- Inventory management: check product availability in real time
- User verification: authenticate users against internal databases
- Weather data: fetch current weather for location-based services
- Booking systems: check availability and make reservations
Pro tips
- Provide detailed descriptions for AI-generated parameters
- Use specific examples in your descriptions
- Test thoroughly before deploying to production
Was this page helpful?