
Bulk Call Campaign Guide
Complete step-by-step guide to create and manage AI-powered bulk call campaigns to reach multiple contacts efficiently.
A complete walkthrough of creating, managing, and analyzing AI-powered bulk call campaigns from the OmniDimension dashboard.
Prerequisites
Before creating a bulk call campaign, you need to set up your phone number and deploy an AI agent.
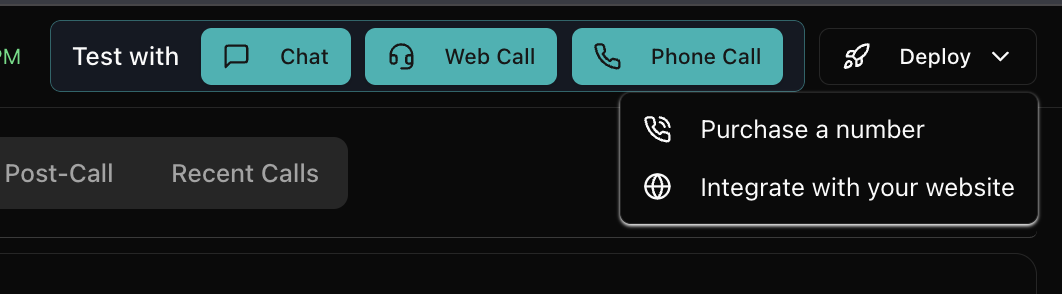
- Navigate to the Phone Numbers section from your dashboard
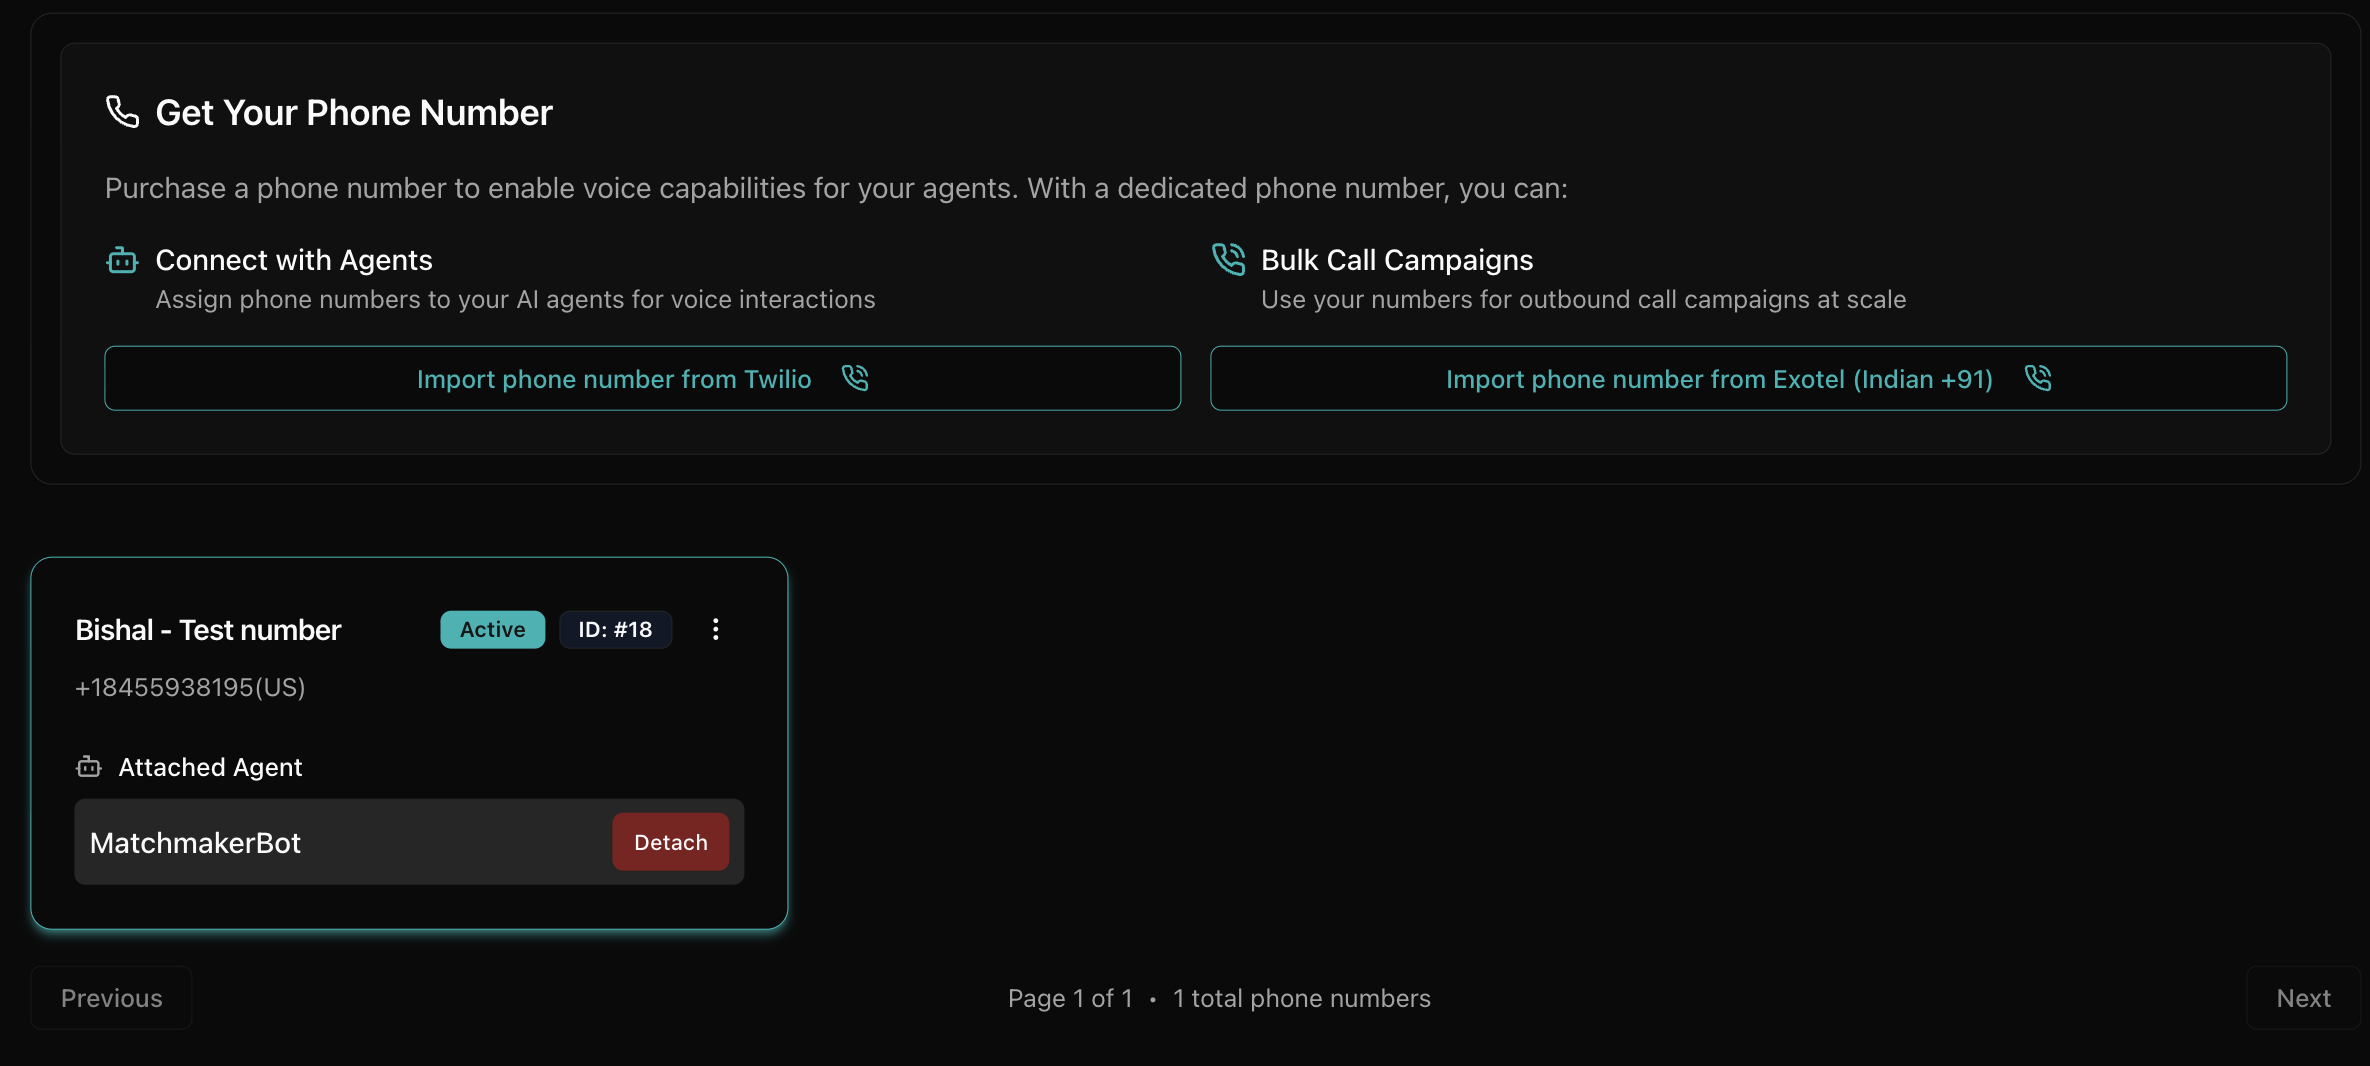
- Import a phone number (e.g., Twilio, Exotel)
- Ensure your agent is properly configured with context, instructions, and integrations
- Attach the agent to your imported phone number
- Test your agent with a single call before running bulk campaigns
Deploy an agent with a phone number
Agent successfully attached
Creating a bulk call campaign
The bulk call creation process is divided into 4 steps. Navigate to the Bulk Call section from your dashboard and click Create New Campaign to begin.
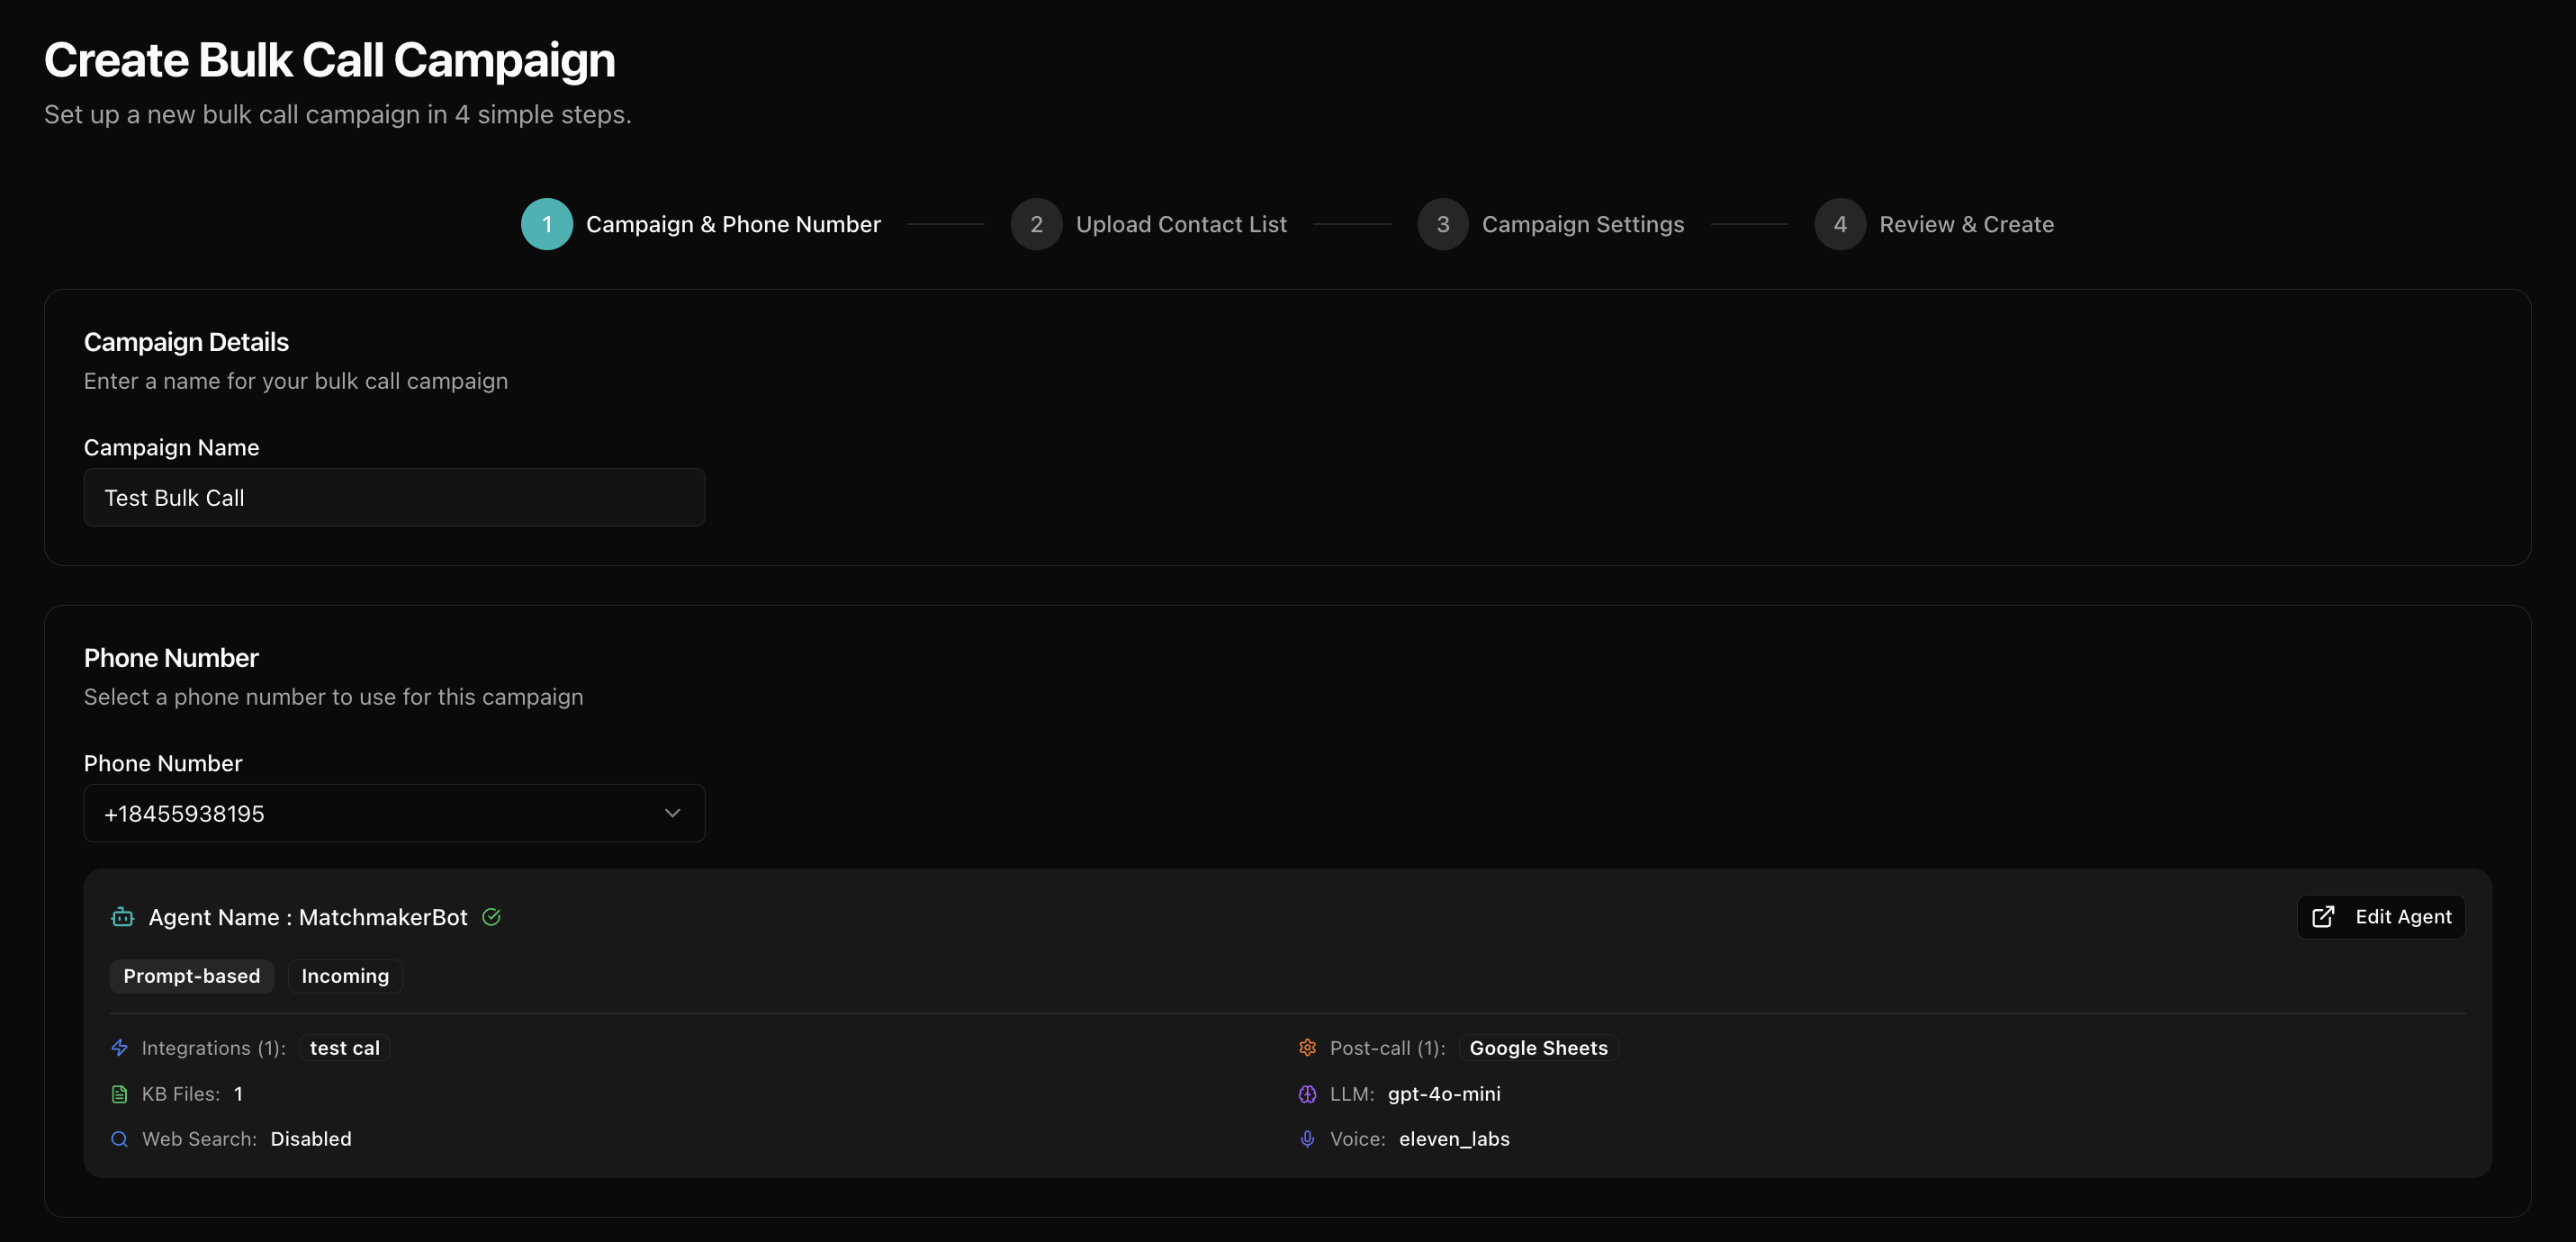
Campaign details and phone number selection
Set up your campaign name and choose the phone number with attached agent for making calls.
- Enter a campaign name. Use descriptive names for easy tracking (e.g., "Q4 Product Launch Outreach")
- Select a phone number from the dropdown
- Review the agent details displayed automatically, including integrations and post-call actions
- Verify the agent configuration is correct for your campaign goals
- Click Next to proceed to Step 2
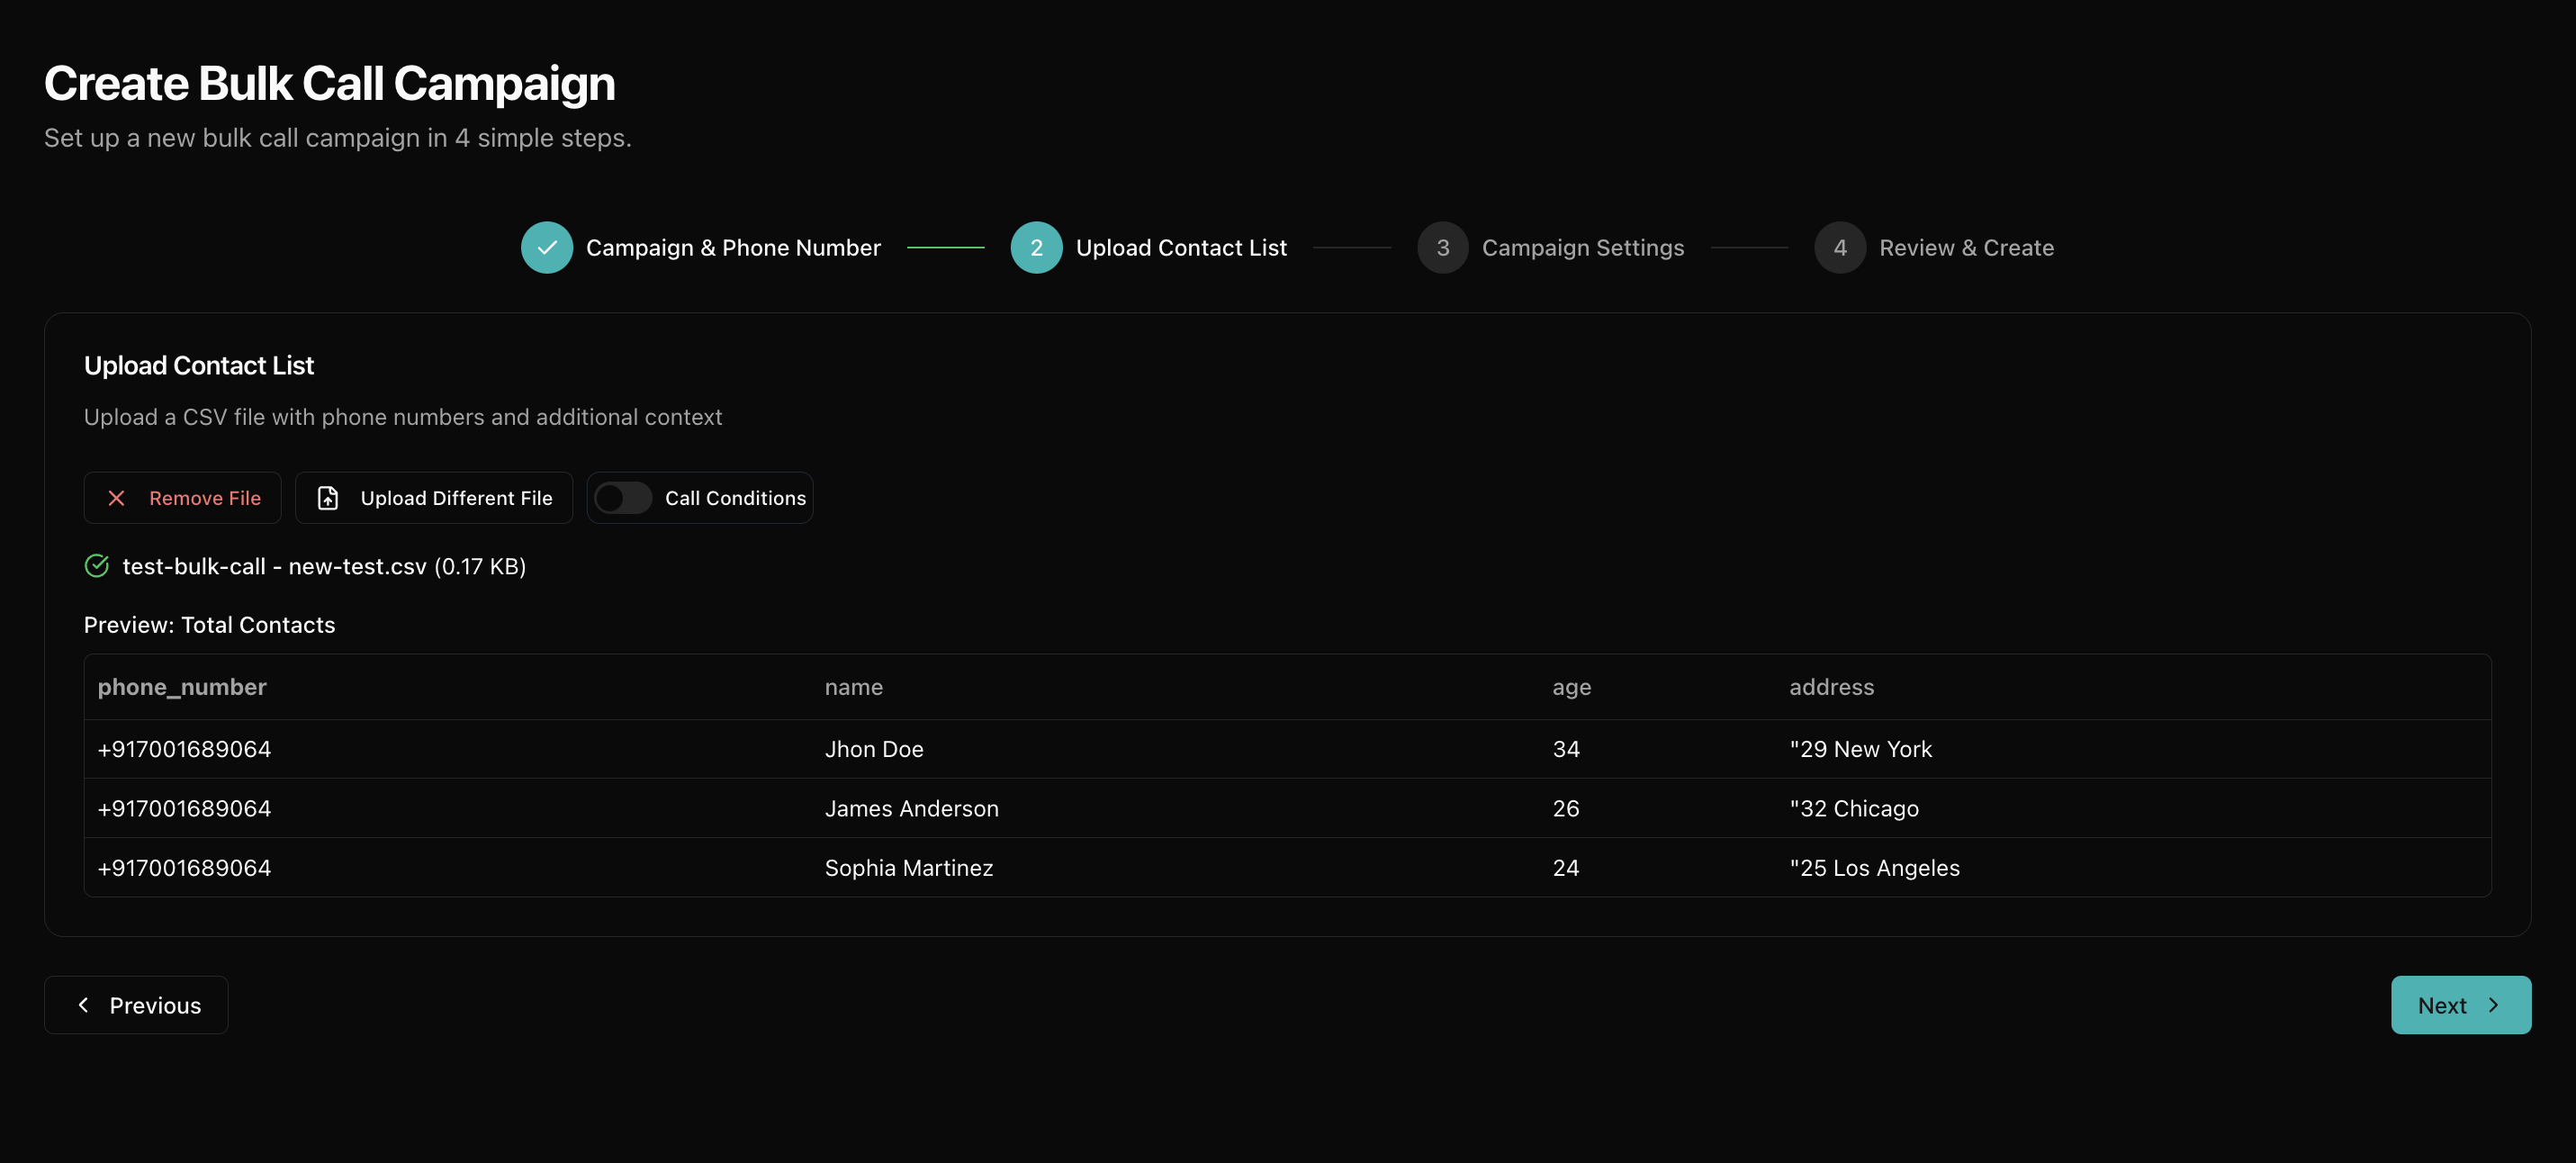
Upload contact list and CSV configuration
Upload your contact list in CSV format and configure call conditions.
- Click Upload CSV File and select your contact list
- The system will automatically detect columns and validate the format
- Review the preview of your uploaded data
- Set optional call conditions to filter which contacts to call
- If missing variables are detected, download the template and add required data
CSV format guidelines
- Required column:
phone_number(with country code, e.g., 1, 91) - Optional columns:
name,company,reason_for_call, etc. - Column names should match variables in your agent's context or welcome message
- Additional columns are automatically passed as context to the AI agent
- Maximum file size: 10 MB
- Supported format:
.csvfiles only - Download the provided template and add the required data columns to ensure optimal agent performance
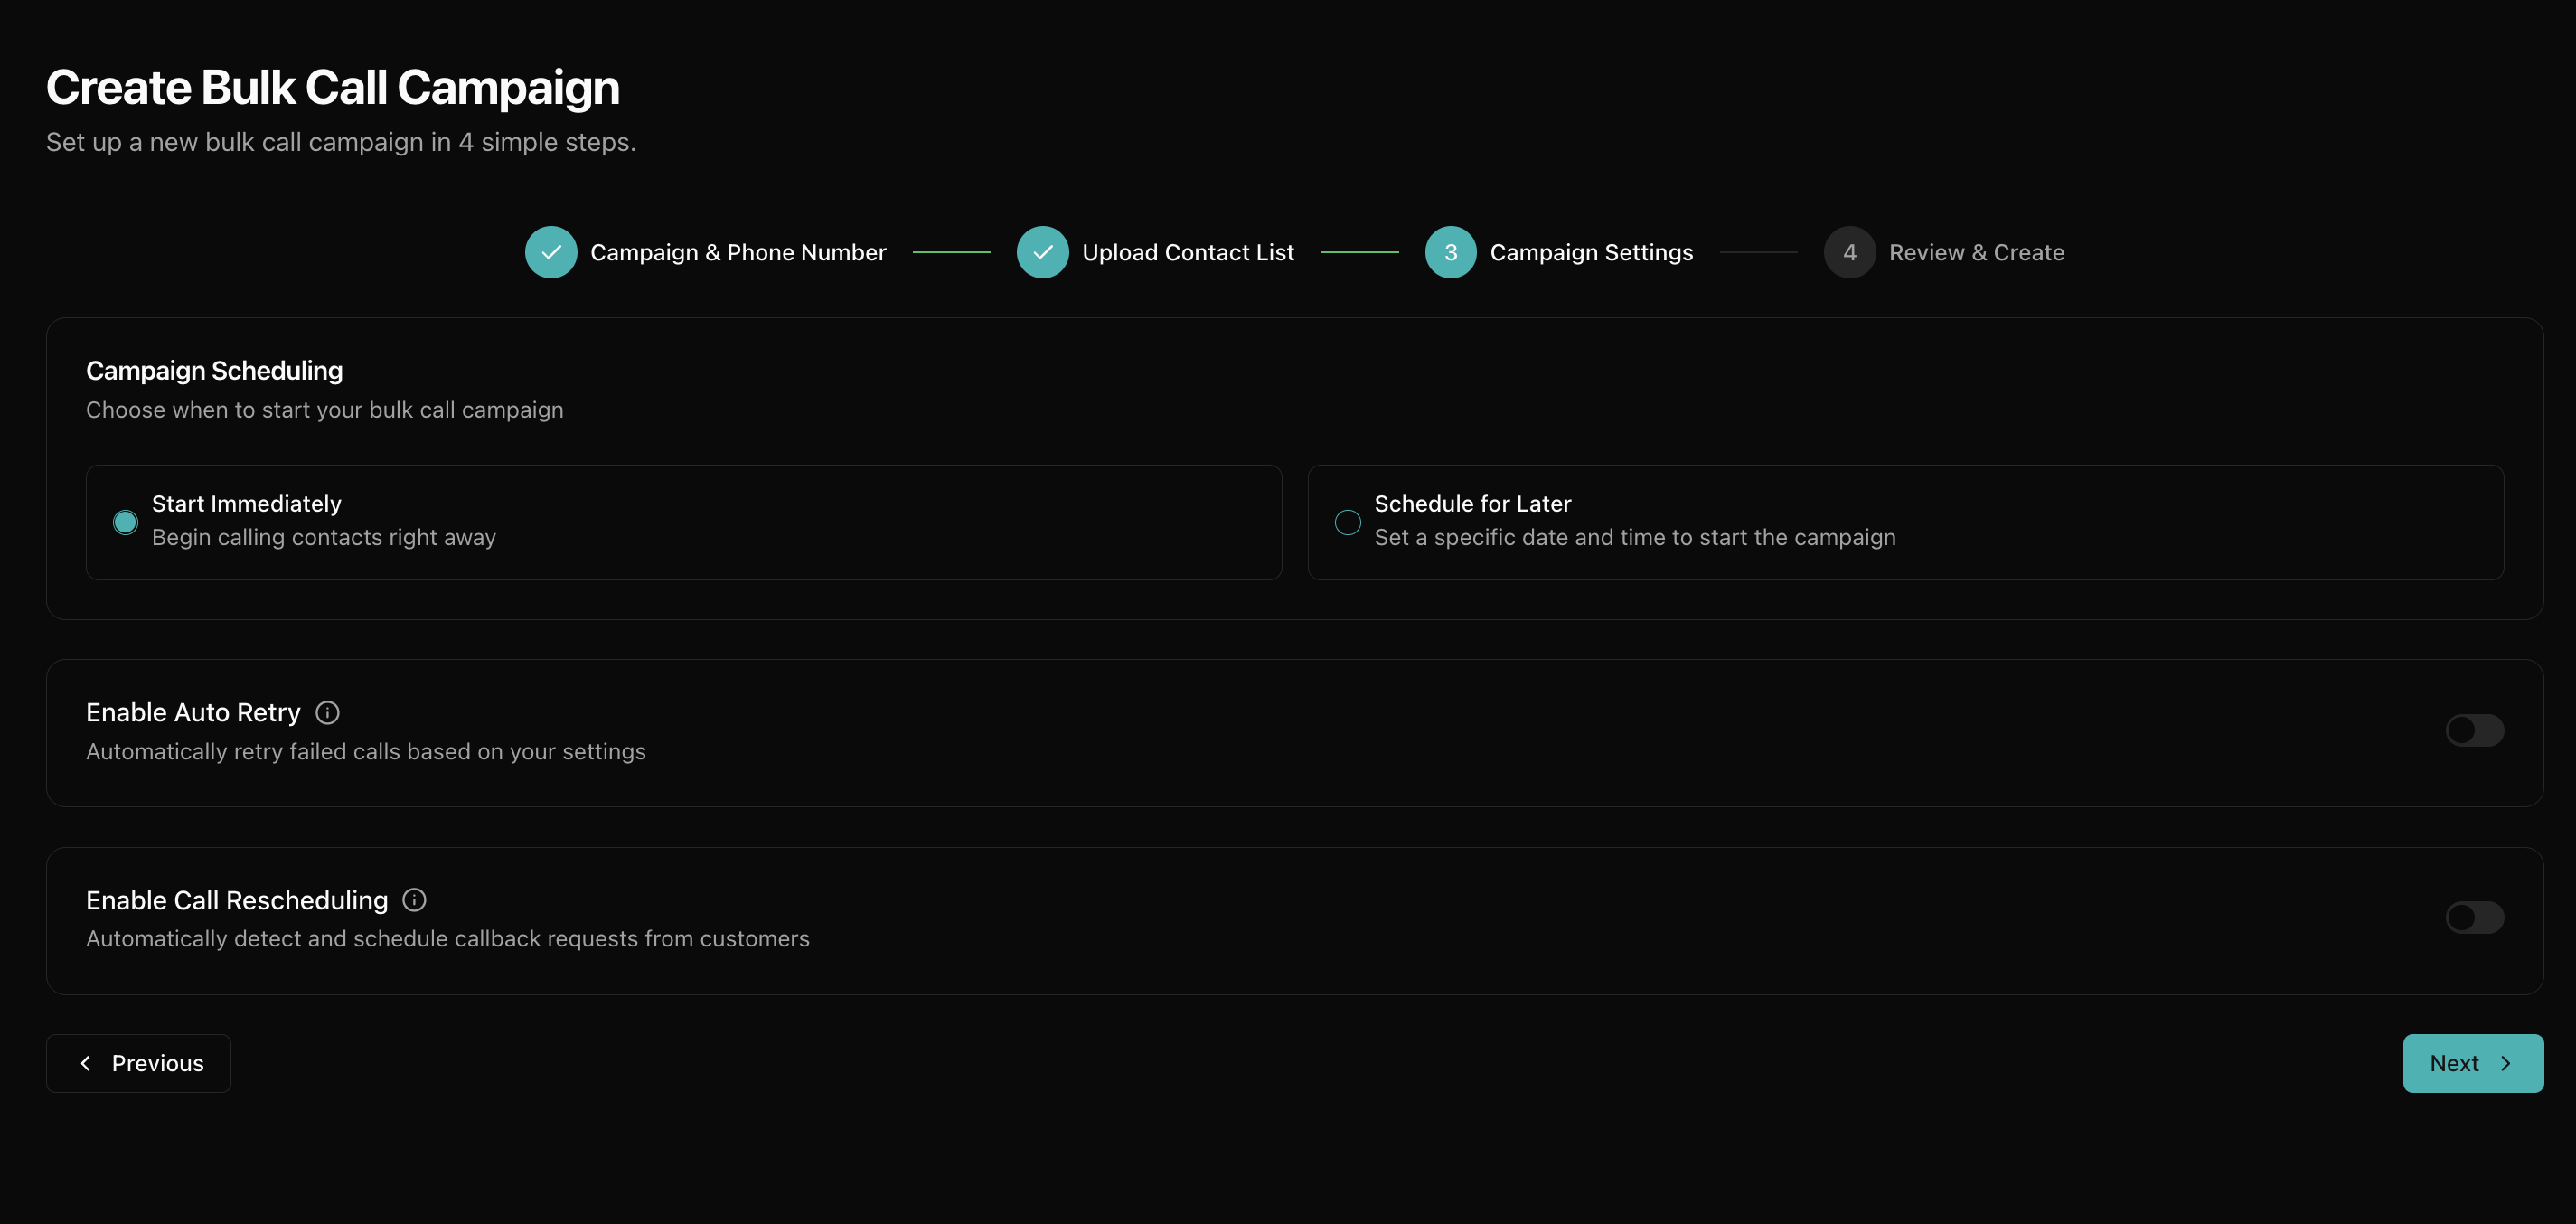
Campaign settings and scheduling
Configure when to start your campaign and set up advanced features like auto-retry and call rescheduling.
- Choose when to start: Start Immediately or Schedule for Later
- If scheduling, set the date, time, and timezone
- Configure Auto Retry settings for failed calls
- Enable Call Rescheduling to automatically handle callback requests
- Click Next to proceed to Step 4
Configuration options
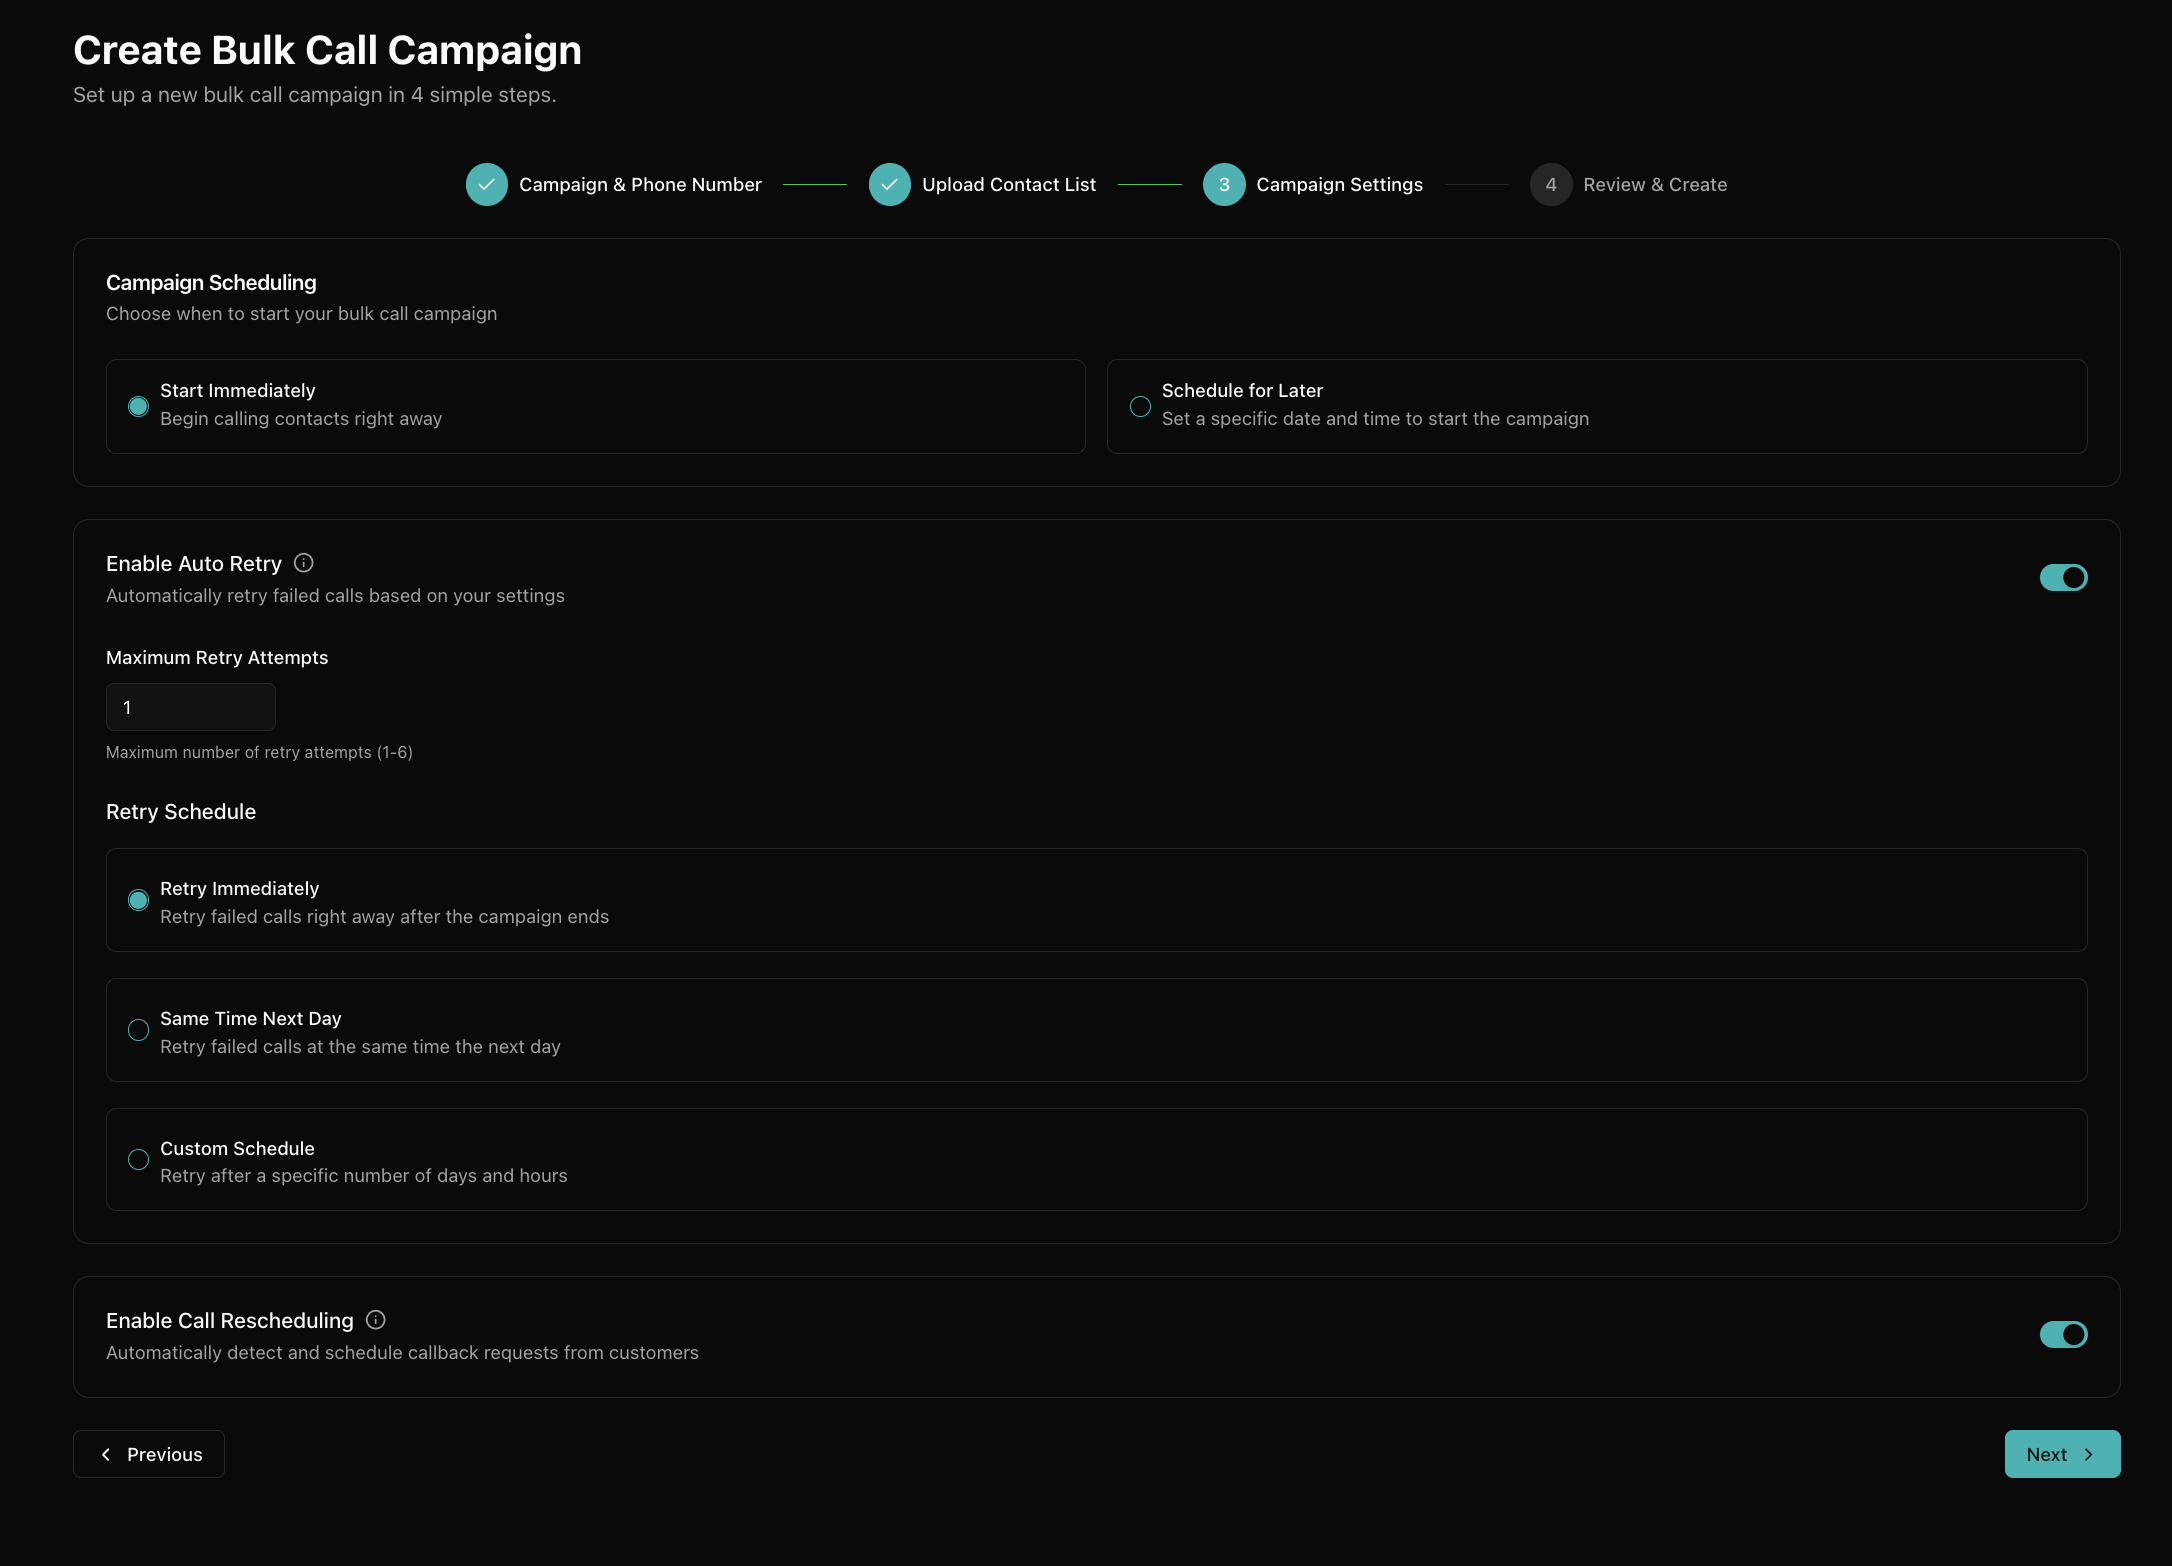
Auto retry settings
- Maximum Retry Attempts: Set retry limit (1–6 attempts maximum)
- Retry Schedule Immediately: Retry failed calls right after the main campaign completes
- Retry Schedule Next Day: Automatically retry all failed calls the following day
- Retry Schedule Scheduled Time: Set custom days and hours delay for retry attempts
- Auto retry only triggers after the main campaign completes
- You can edit retry settings even after campaign creation
Call rescheduling
- Enable Call Rescheduling in campaign settings
- AI automatically detects customer requests like "call me tomorrow" or "I'm busy right now"
- Automatically schedules follow-up calls based on customer preferences
- Works by analyzing conversation for reschedule requests during the call
- Improves customer experience and conversion rates
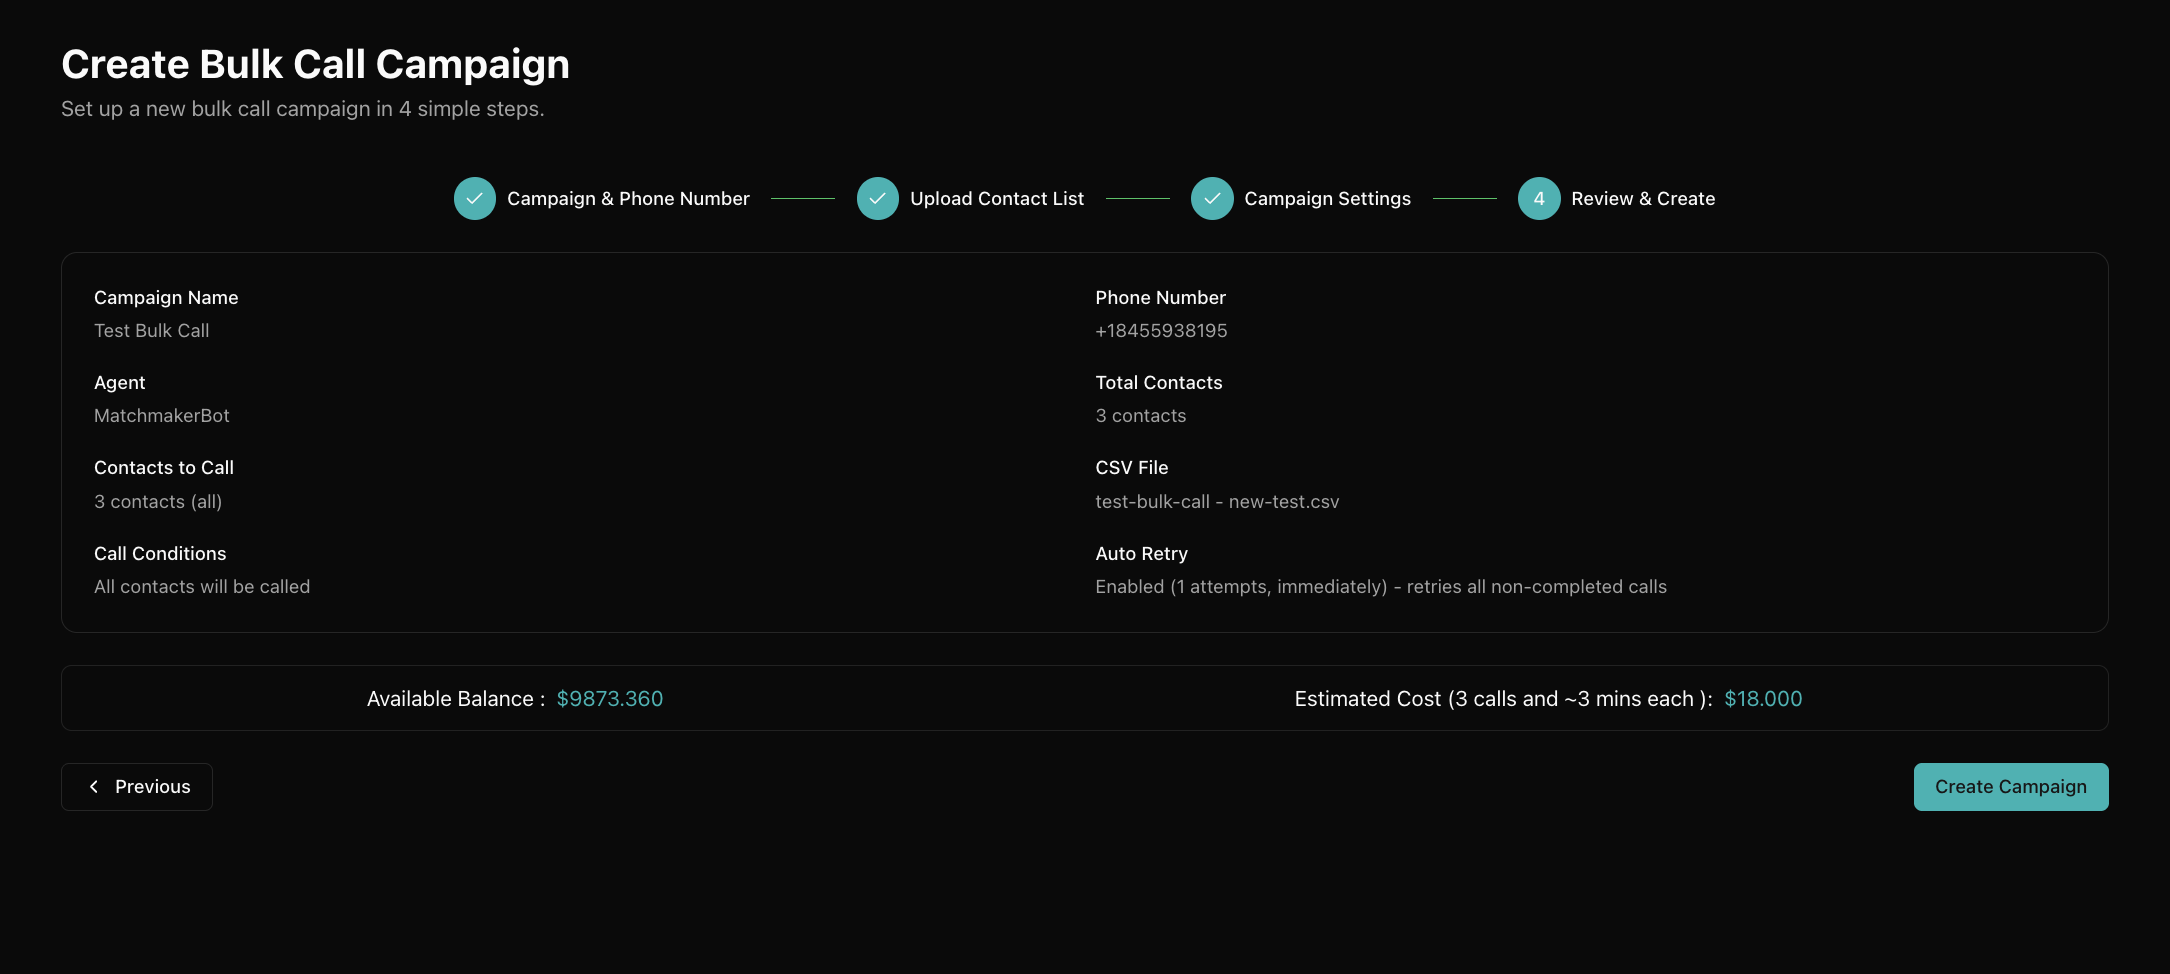
Review and create campaign
Final review of all campaign settings before creation.
- Review all campaign details: name, phone number, and agent configuration
- Check the number of contacts to be called
- Verify scheduling settings (immediate start or scheduled time)
- Confirm auto-retry settings and maximum retry attempts
- Check estimated cost and ensure sufficient account balance
- Click Create Campaign to launch or schedule your bulk call campaign
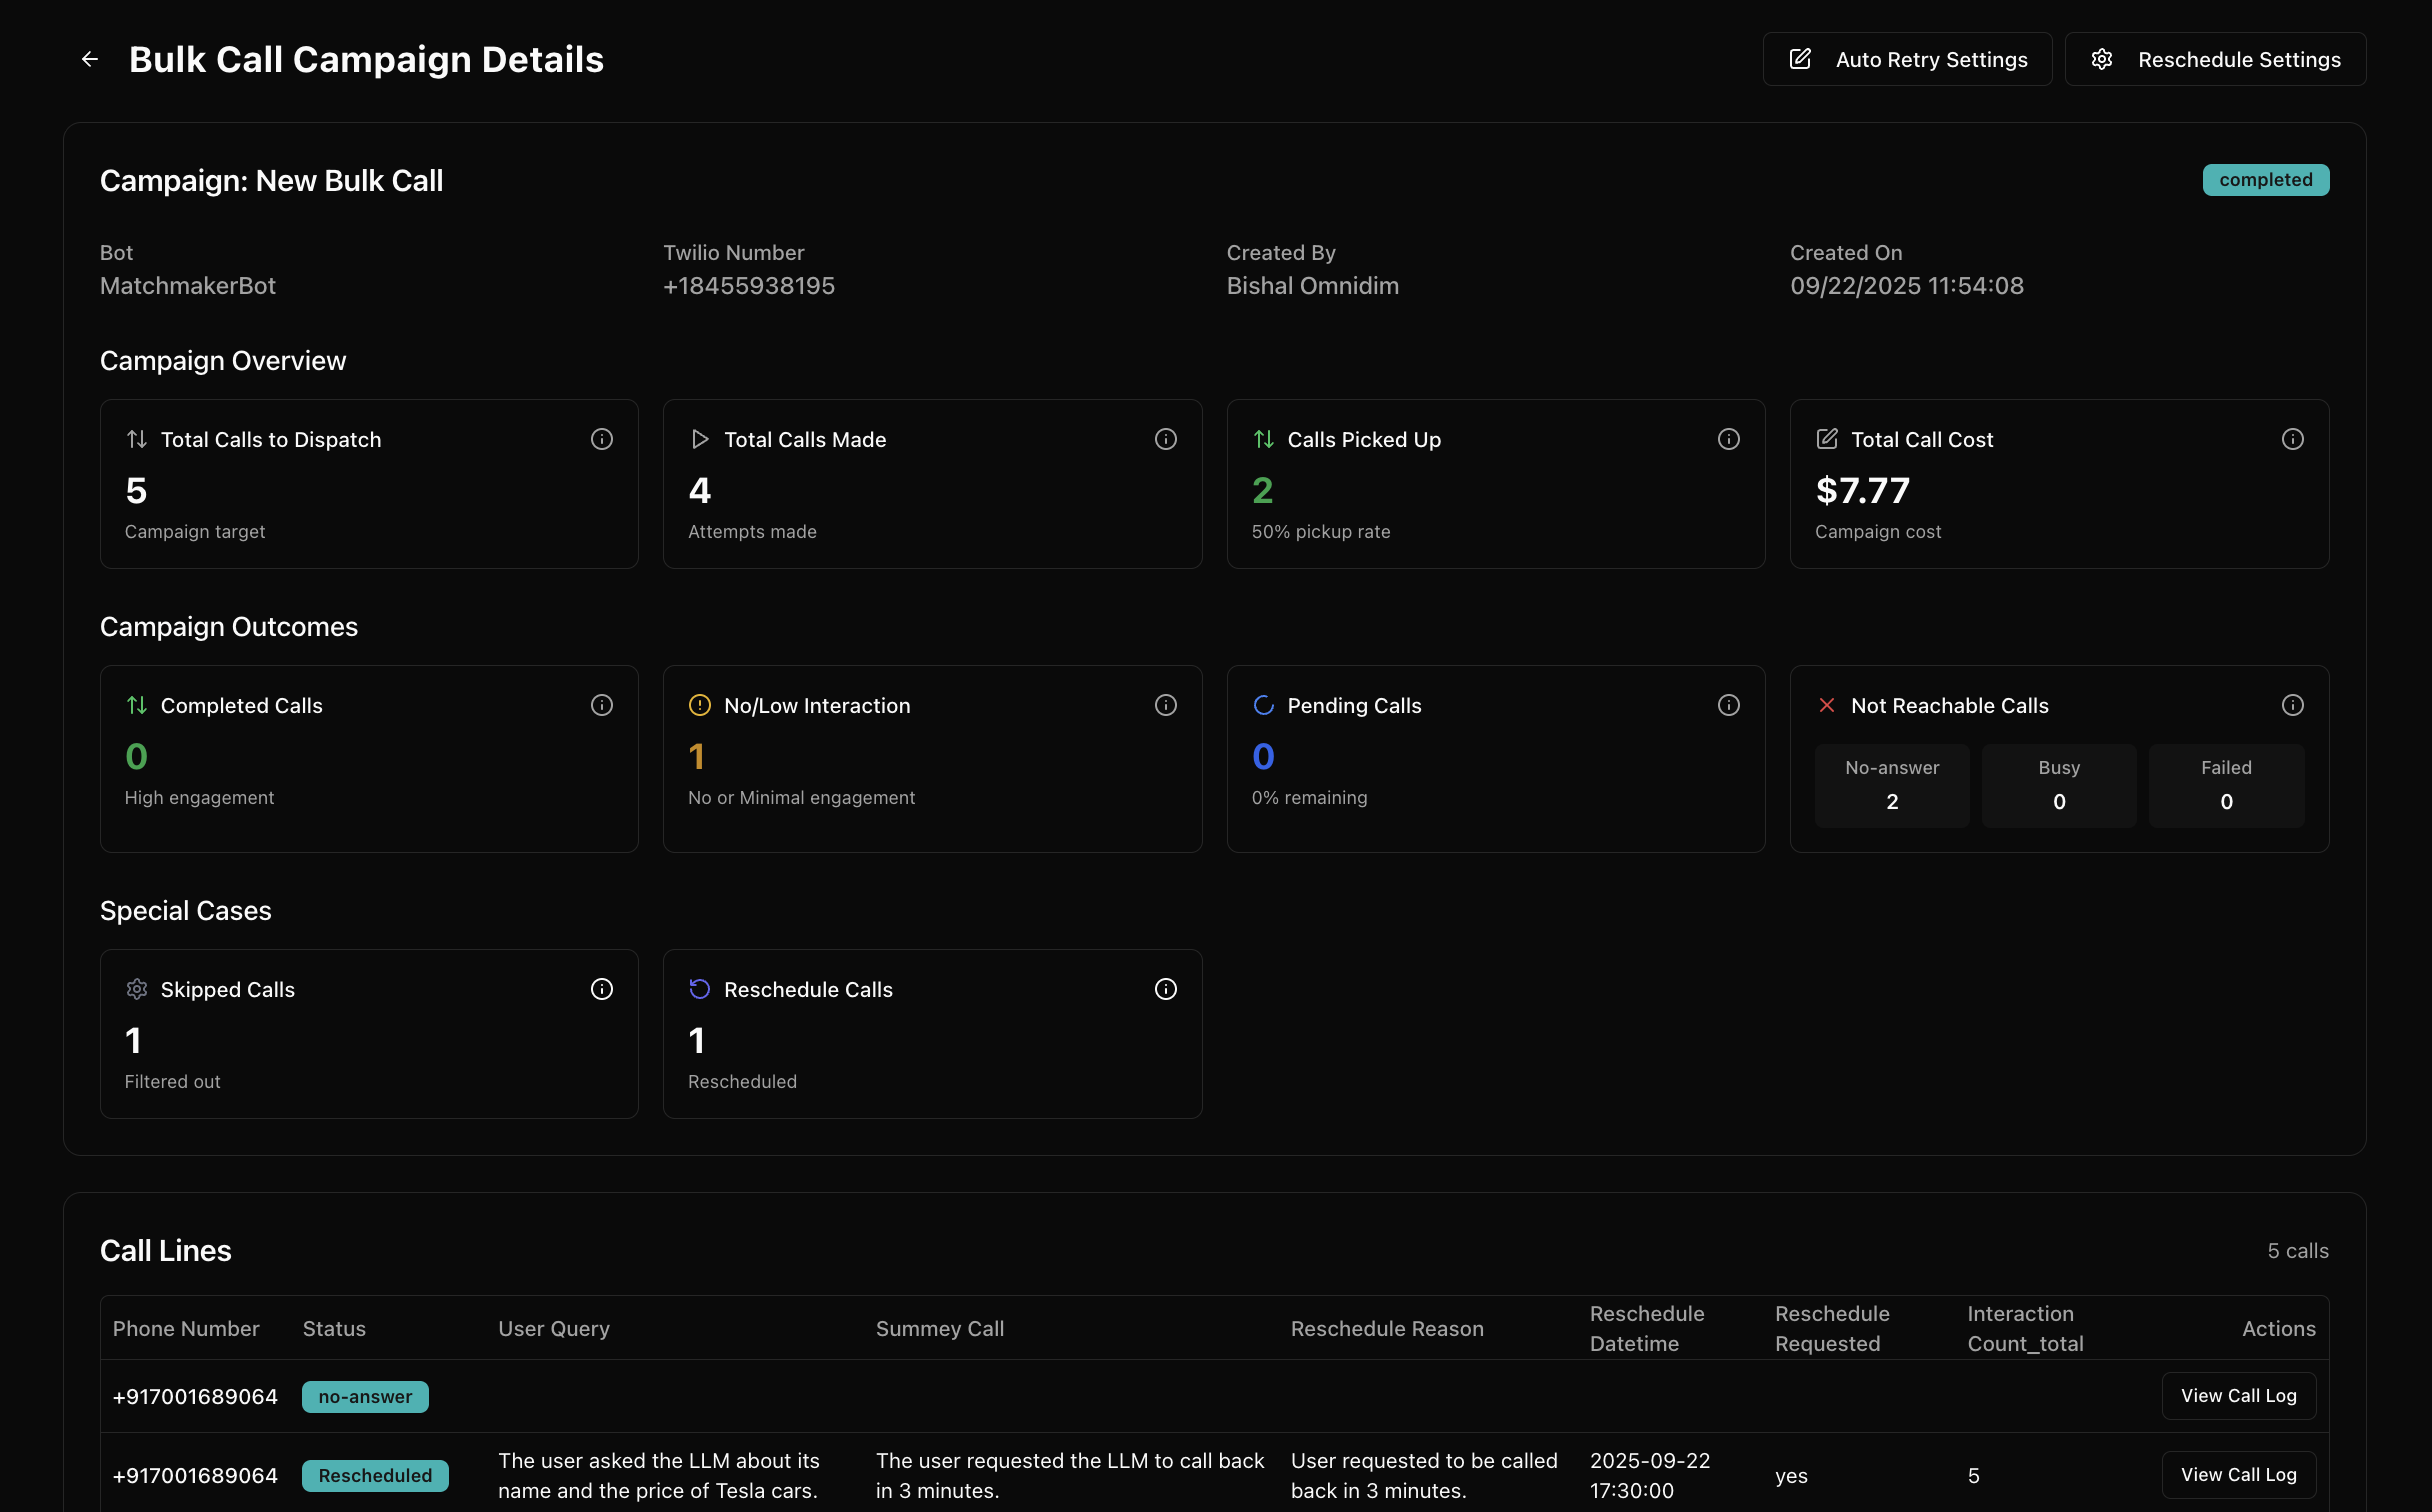
Campaign management after creation
Once your campaign is created, you can monitor, control, and analyze its performance.
- Pause Campaign: Temporarily stop an active campaign
- Resume Campaign: Continue a paused campaign
- Update Reschedule Settings: Enable / disable call rescheduling during campaign
- Update Auto Retry Settings: Modify retry attempts and schedule
Best practices for successful campaigns
- Test with a small batch first before launching to your entire list
- Use descriptive campaign names: include date, purpose, and target audience for easy tracking
- Include relevant context columns that match your agent's variables for personalized conversations
- Set appropriate retry limits: 2–3 retry attempts are usually optimal
- Enable call rescheduling to improve success rates and brand reputation
- Check progress regularly and adjust settings based on real-time performance
- Use campaign analytics to improve future campaigns and agent performance
See Bulk outbound best practices for the full optimization playbook.