Healthcare appointment booking
Build a voice agent for healthcare appointment scheduling, doctor availability, and clinic info.
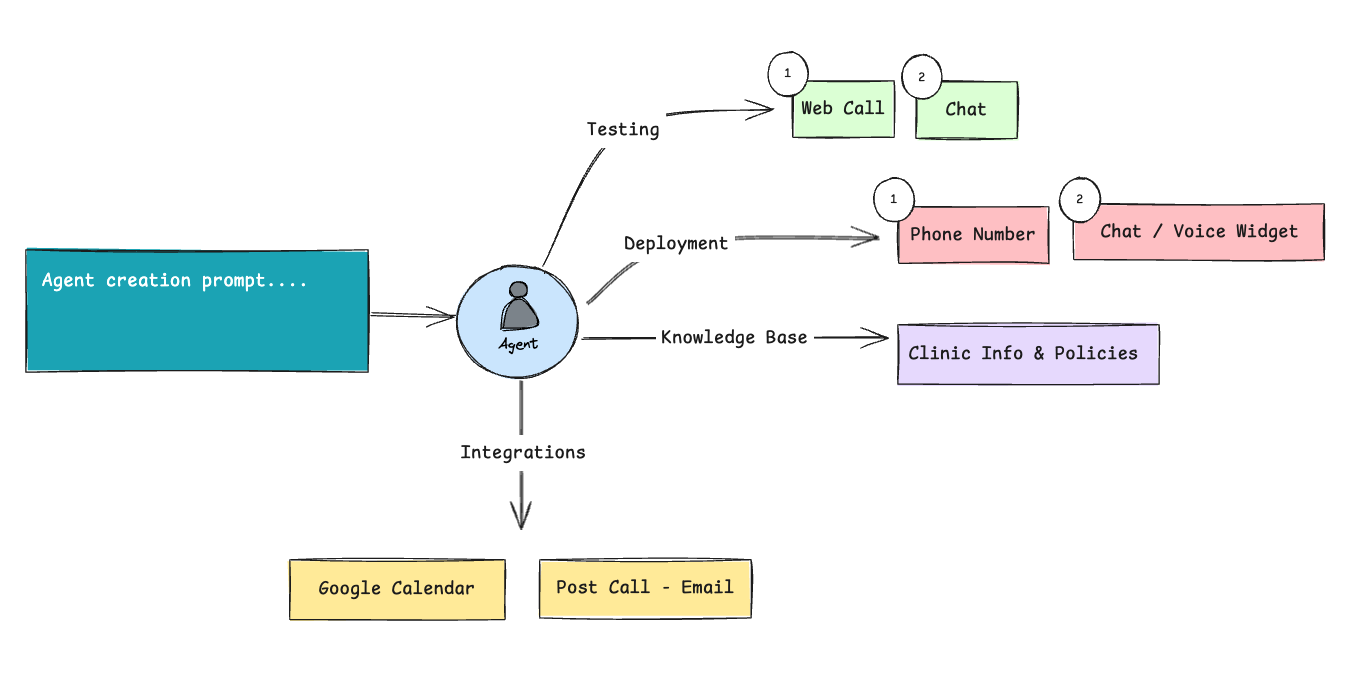
Walk through configuring a complete appointment-booking voice agent. The agent greets patients, identifies intent, books slots via Google Calendar, answers FAQs from a knowledge base, and emails post-call summaries.
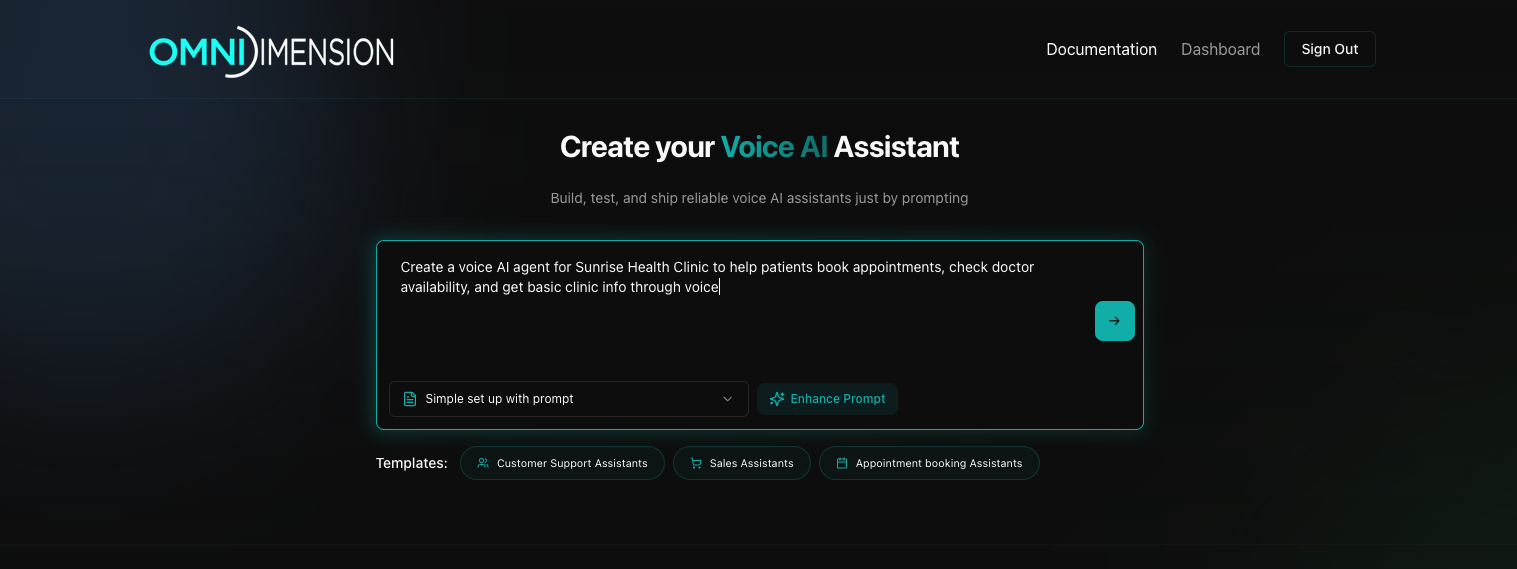
Write the prompt
Start the setup by writing a clear initial prompt that defines the purpose of the bot.
Example prompt: Create a voice AI agent for Sunrise Health Clinic to help patients book appointments, check doctor availability, and get basic clinic info through voice.
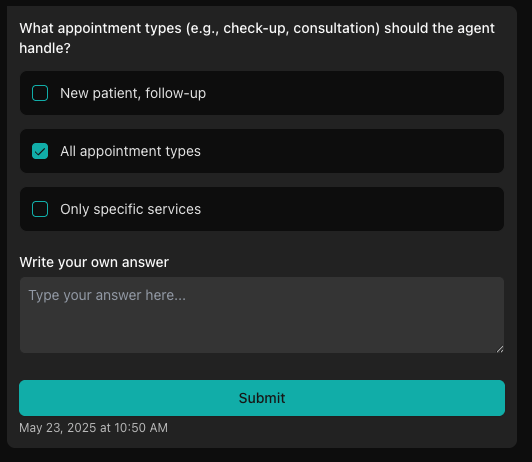
Answer clarifying questions
The platform will prompt you with clarifying questions. Answer these precisely to help tailor the voice agent for your specific use case. You can select from provided options or write your own custom answers if the options don't match your needs.
Automatic agent creation
The system uses your prompt and answers to auto-generate an initial version of the voice assistant. This includes welcome message, basic conversational flow, collecting user data, and variable extraction in post-call.
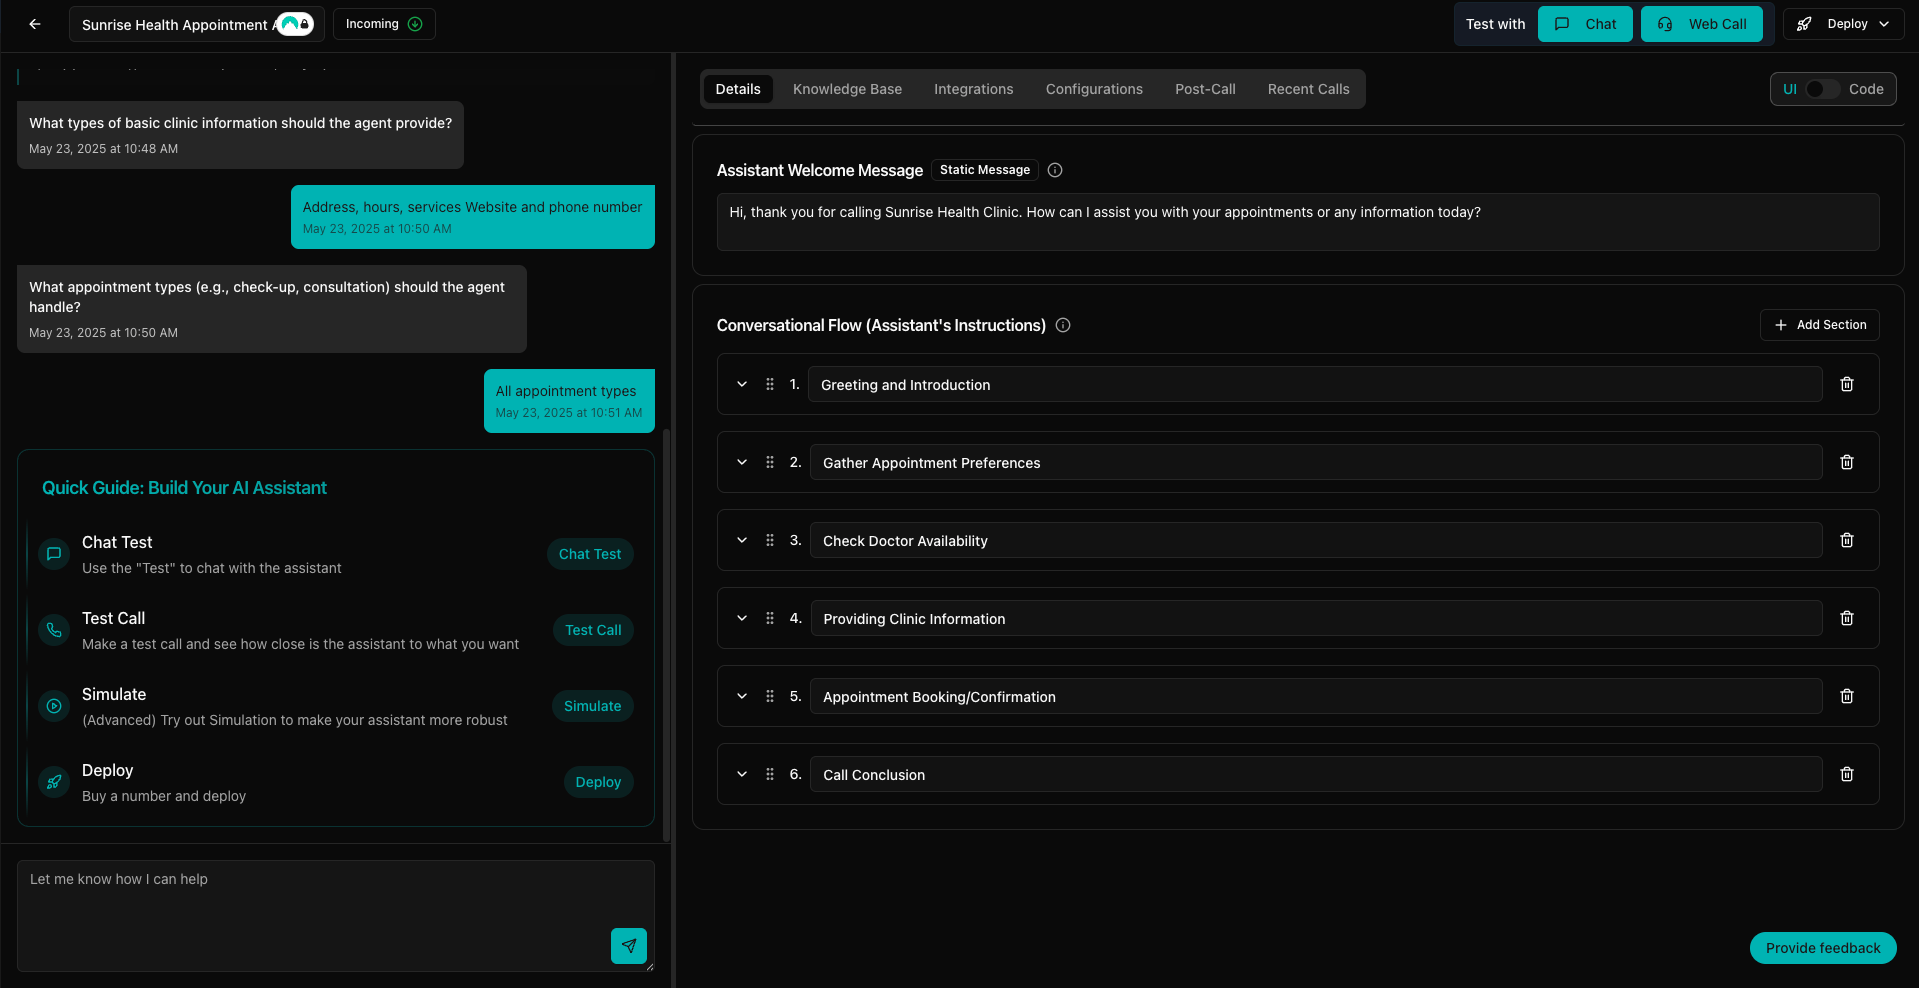
Review and customize agent details
- Navigate to the Details section of the platform
- Edit the welcome message. Ensure it is friendly and aligned with your brand voice.
- Review each step of the user journey (greeting, intent identification, slot filling, confirmation)
- Edit existing prompts or add new sections to better guide the conversation, edge cases, or FAQs

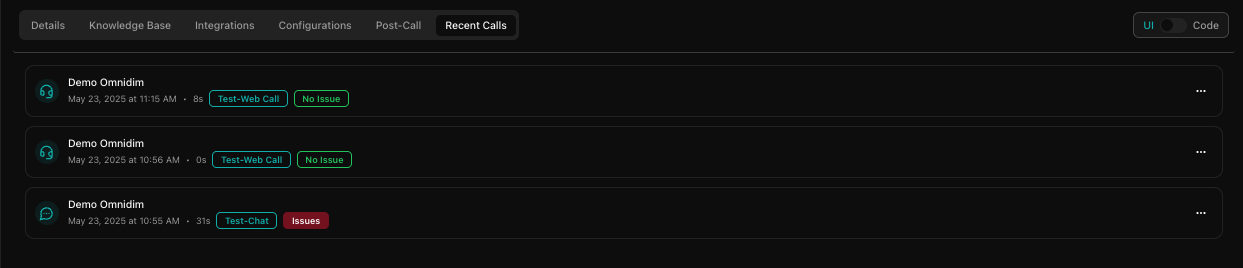
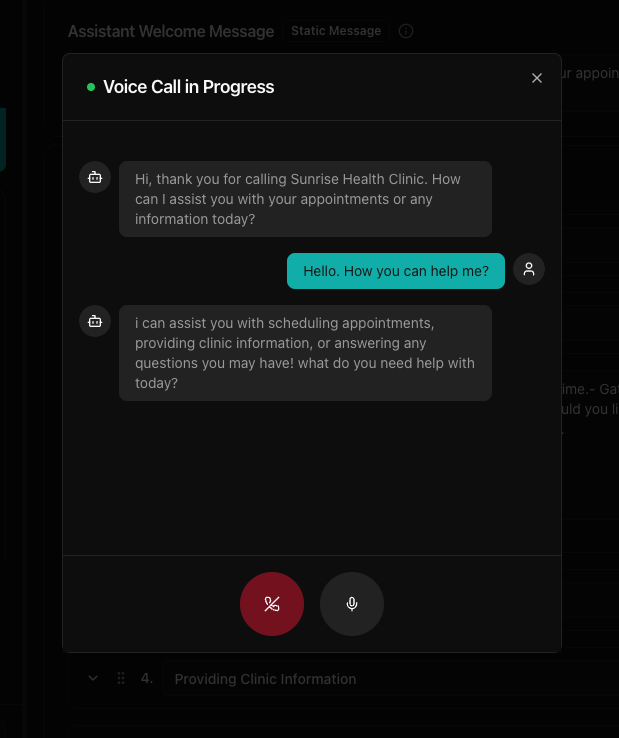
Test the agent
Use the platform's testing tools at the top right of the window:
- Test With Chat for text-based interaction
- Test With Webcall for voice-based testing

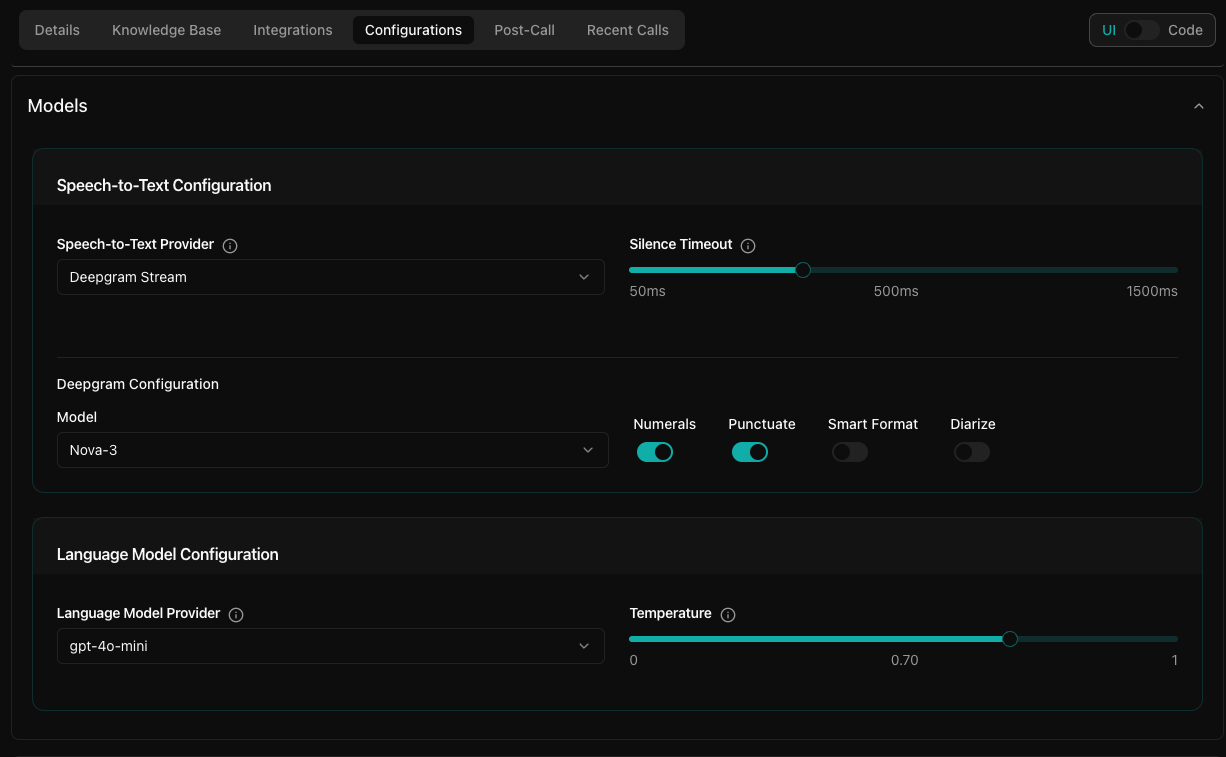
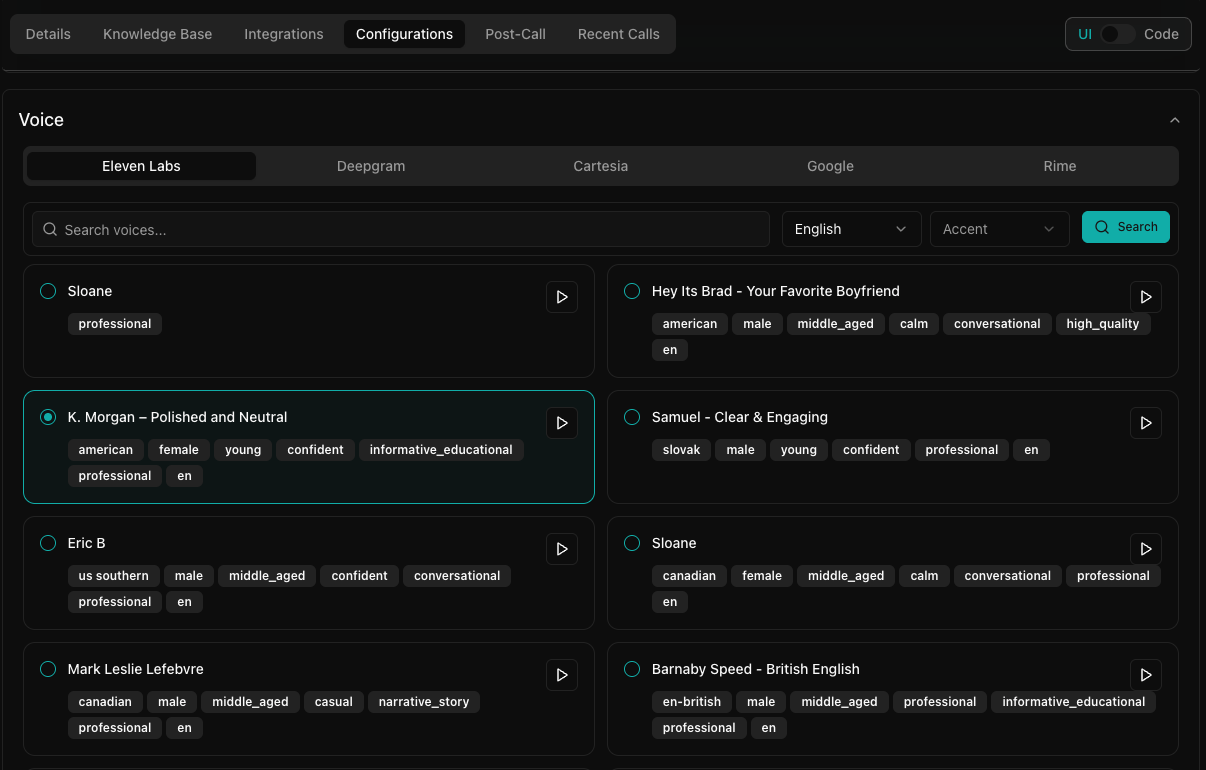
Configure model and voice
In the Configuration tab you can edit or adjust agent configuration.
- Model: select the desired LLM
- TTS: configure text-to-speech and choose appropriate voice settings
- Adjust filler words and other behavior customization settings as needed
Calendar integration
Integrate with Google Calendar to enable automatic booking.
- Open the Integrations tab
- Click Connect next to Google Calendar
- Complete the OAuth flow to securely link your account
- Once connected, the calendar will be automatically attached to the agent
- The bot can check availability, book slots, and send invites
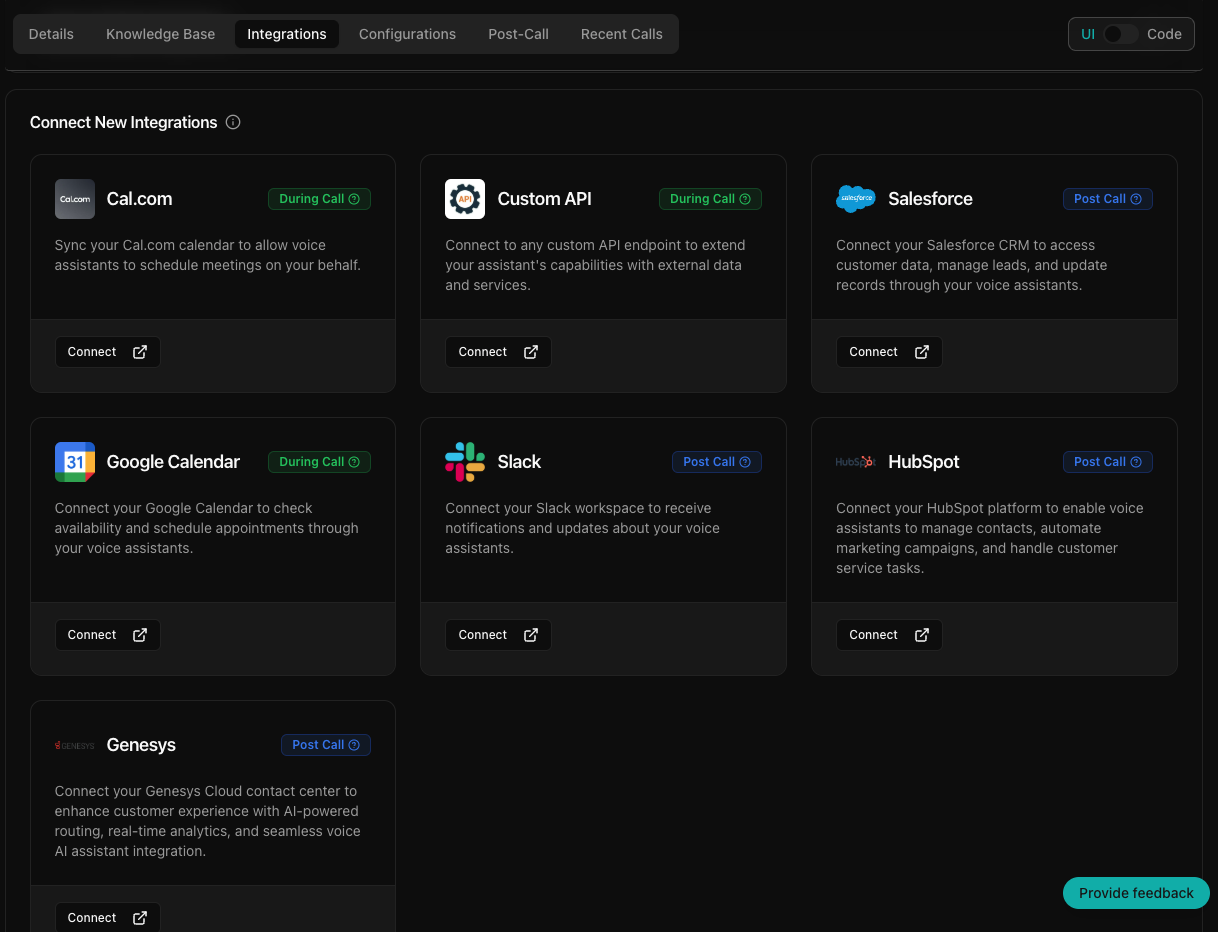
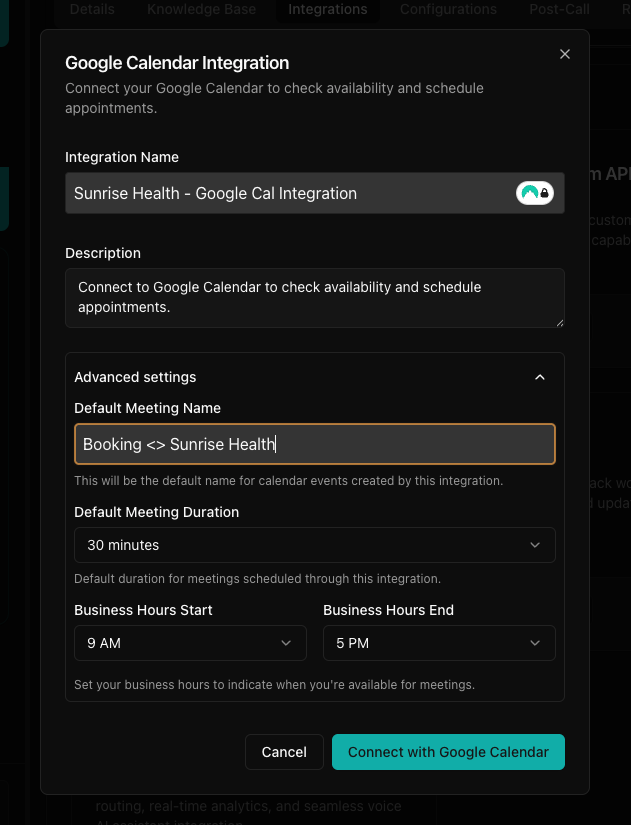
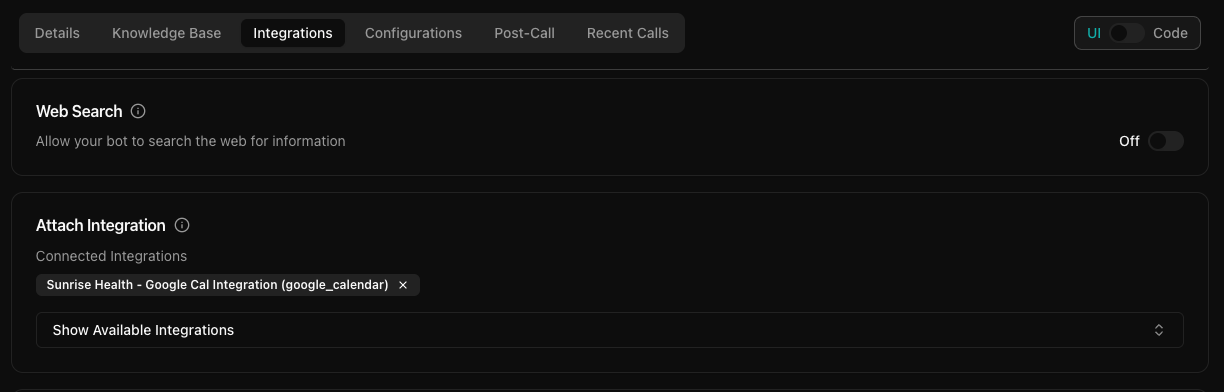
See Google Calendar integration for the full walkthrough.
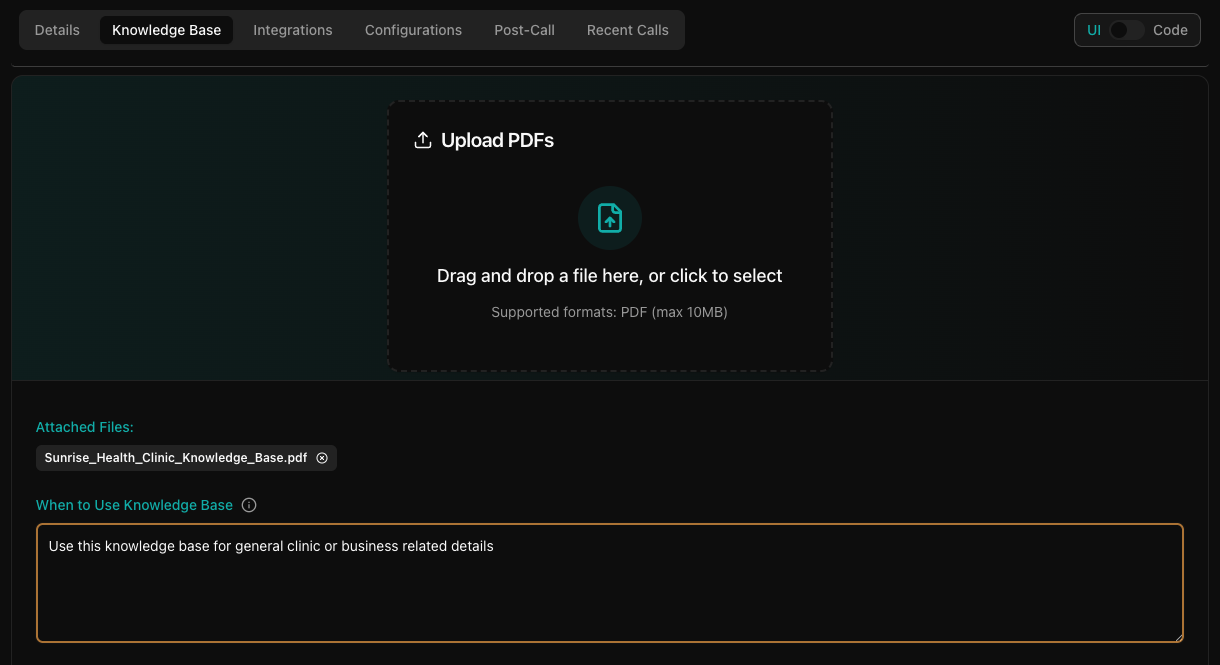
Knowledge base
You can add a knowledge base to your bot to provide additional information.
- Navigate to the Knowledge Base section
- Upload relevant documents (for example, PDFs with clinic policies, service descriptions)
- Documents are auto-attached to the bot
- You can also set rules for when and why the knowledge base should be utilized
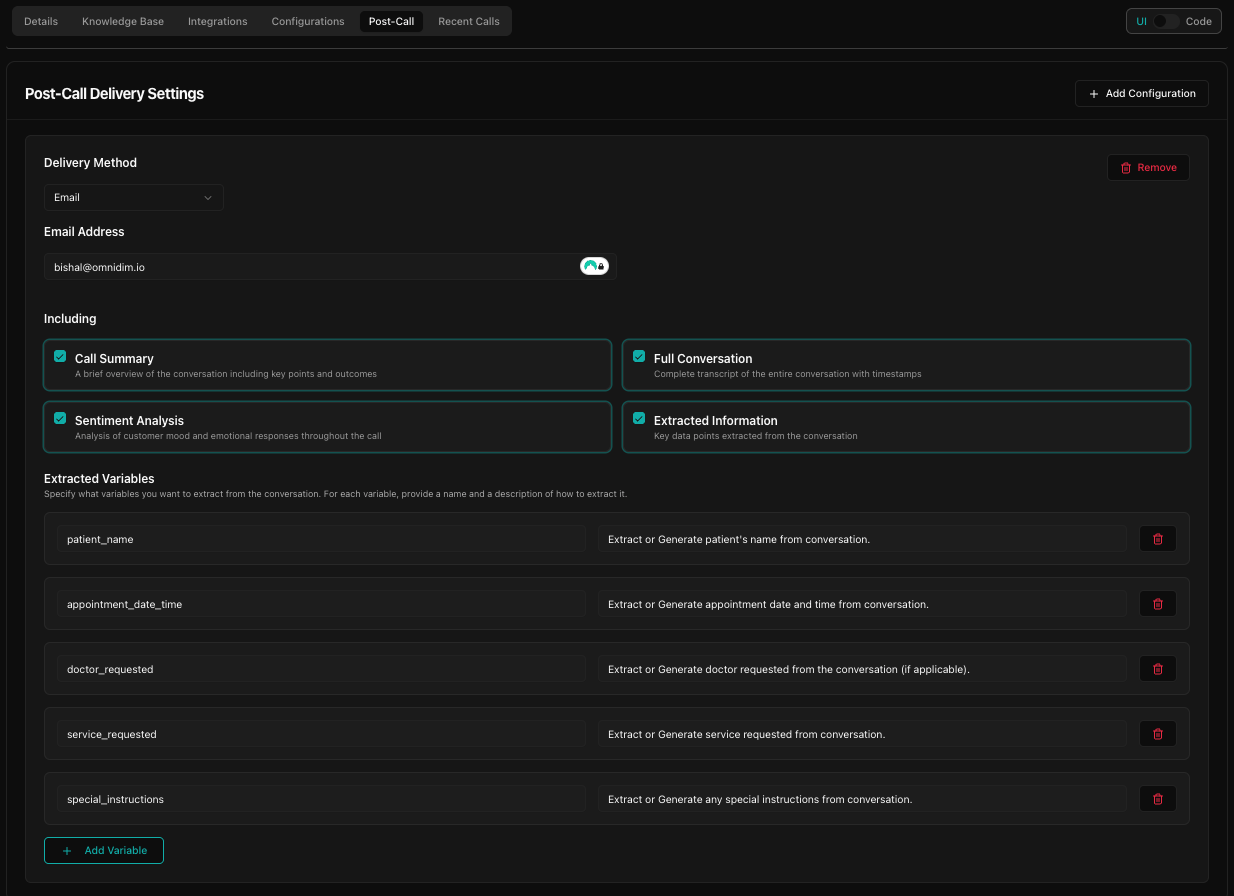
Post-call actions
Set up what happens after the call is completed.
- Go to the Post Call section
- Select Email Delivery as the post-call action
- Enter the recipient's email address
- Choose what to include: call summary, full transcript, sentiment analysis, variable extraction
Final testing and monitoring
- Re-test the agent via chat and web call to confirm all functionality
- Validate booking flow, fallback responses, and knowledge base retrieval
- Navigate to the Call Logs section to monitor call interactions with evaluation details